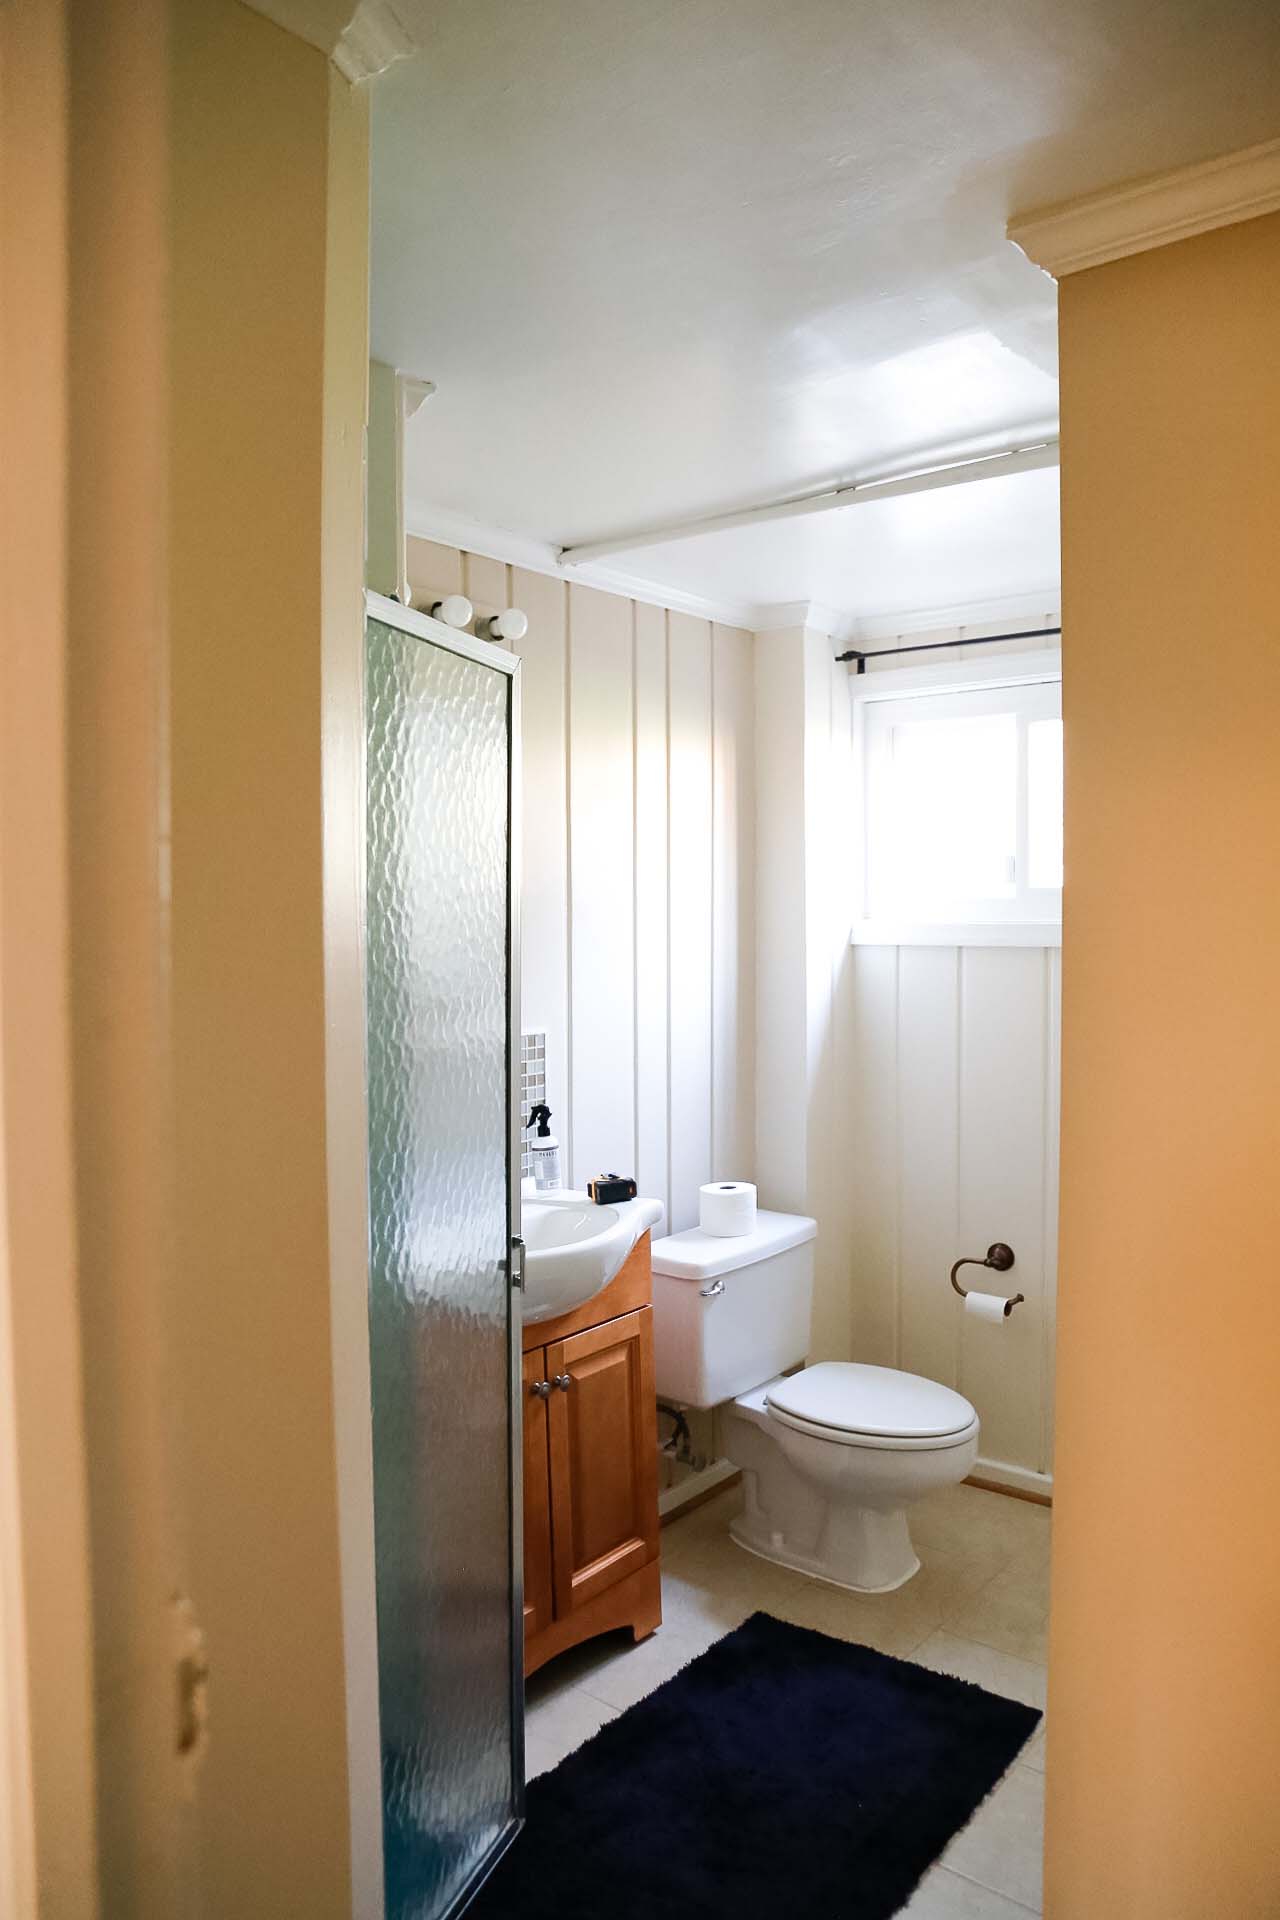
If you popped in last week to see the before photos of our bathroom, you probably caught that we actually started this project a while ago and it’s been on hold since January. (If I’m committing a One Room Challenge faux paus, please accept this as my official apology!) We intended to renovate this bathroom in January (like, finish it in a month—ha!), and then as soon as the demo pile from this tiny bathroom started adding up, we realized we were going to need to rent a(nother) dumpster for the debri and once you do that, you better fill it up to get the most bang for your buck! And that is how we ended up doing a renovation of an entire floor of our home in 2020. Shit escalates fast!
So while these are oldies, they’re good, and you need to see ’em to know where this project has come from. I mean, what good would a project progress report be if their wasn’t some dirty work?!
Demo
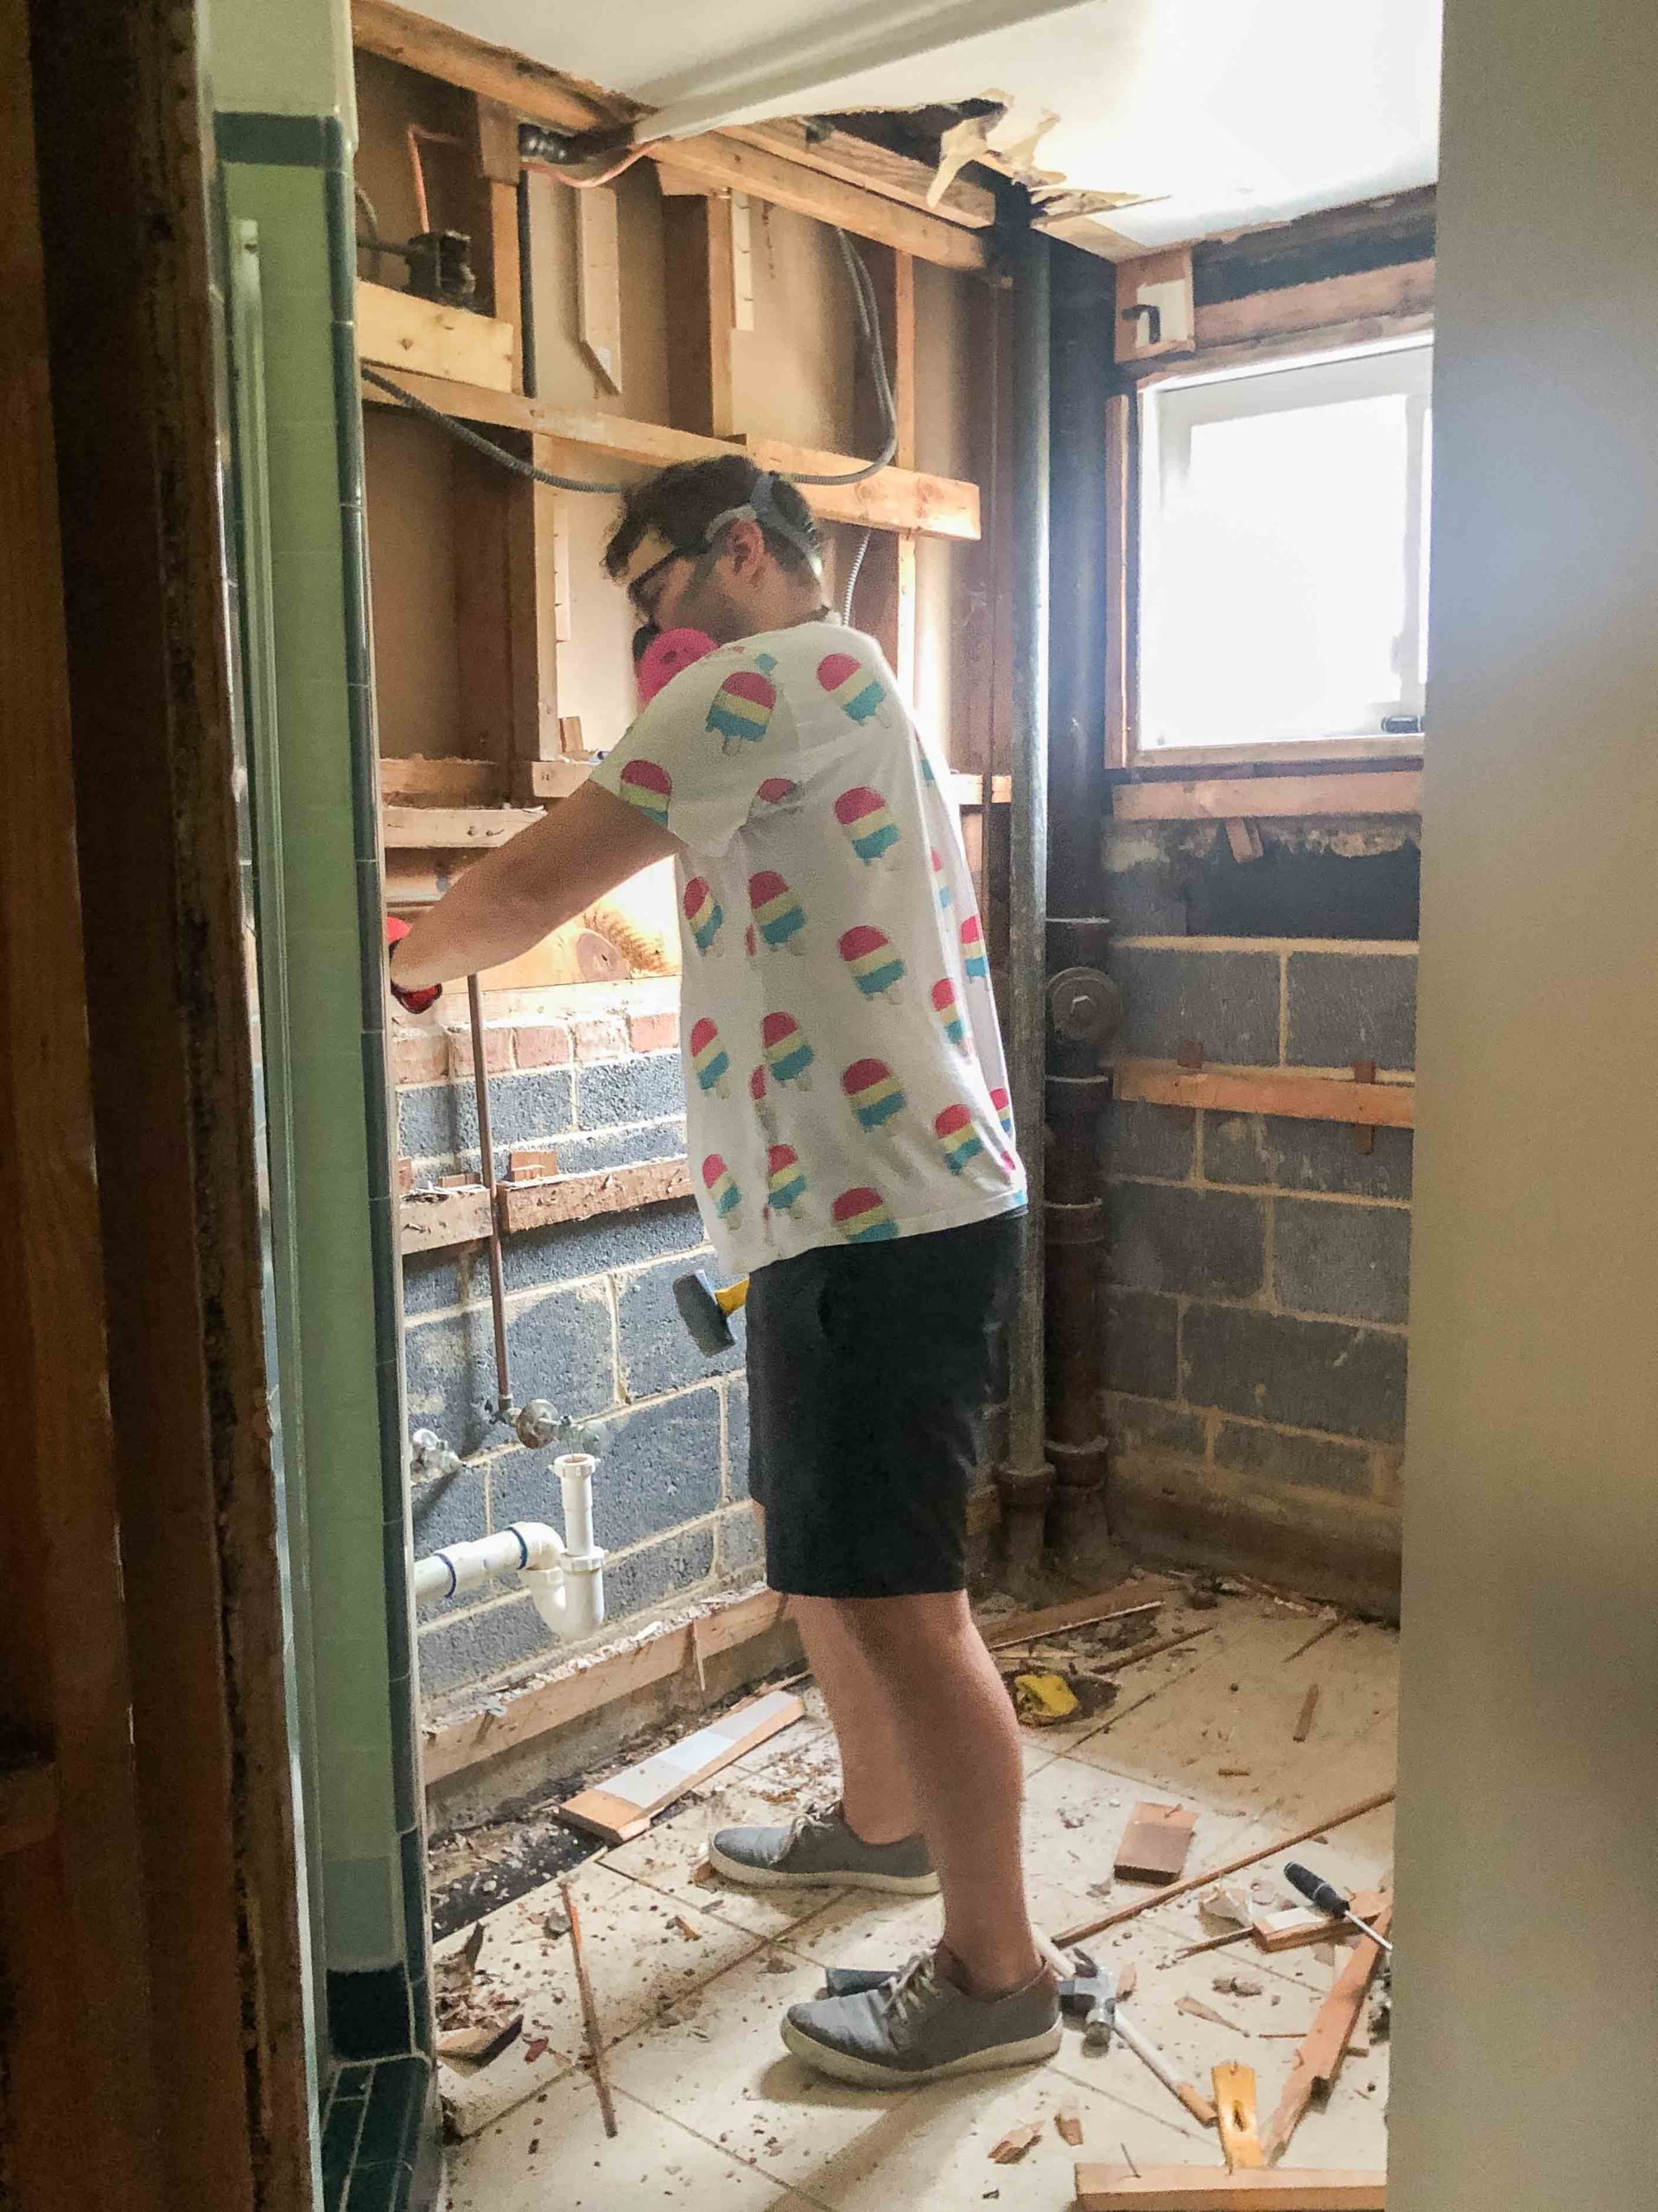
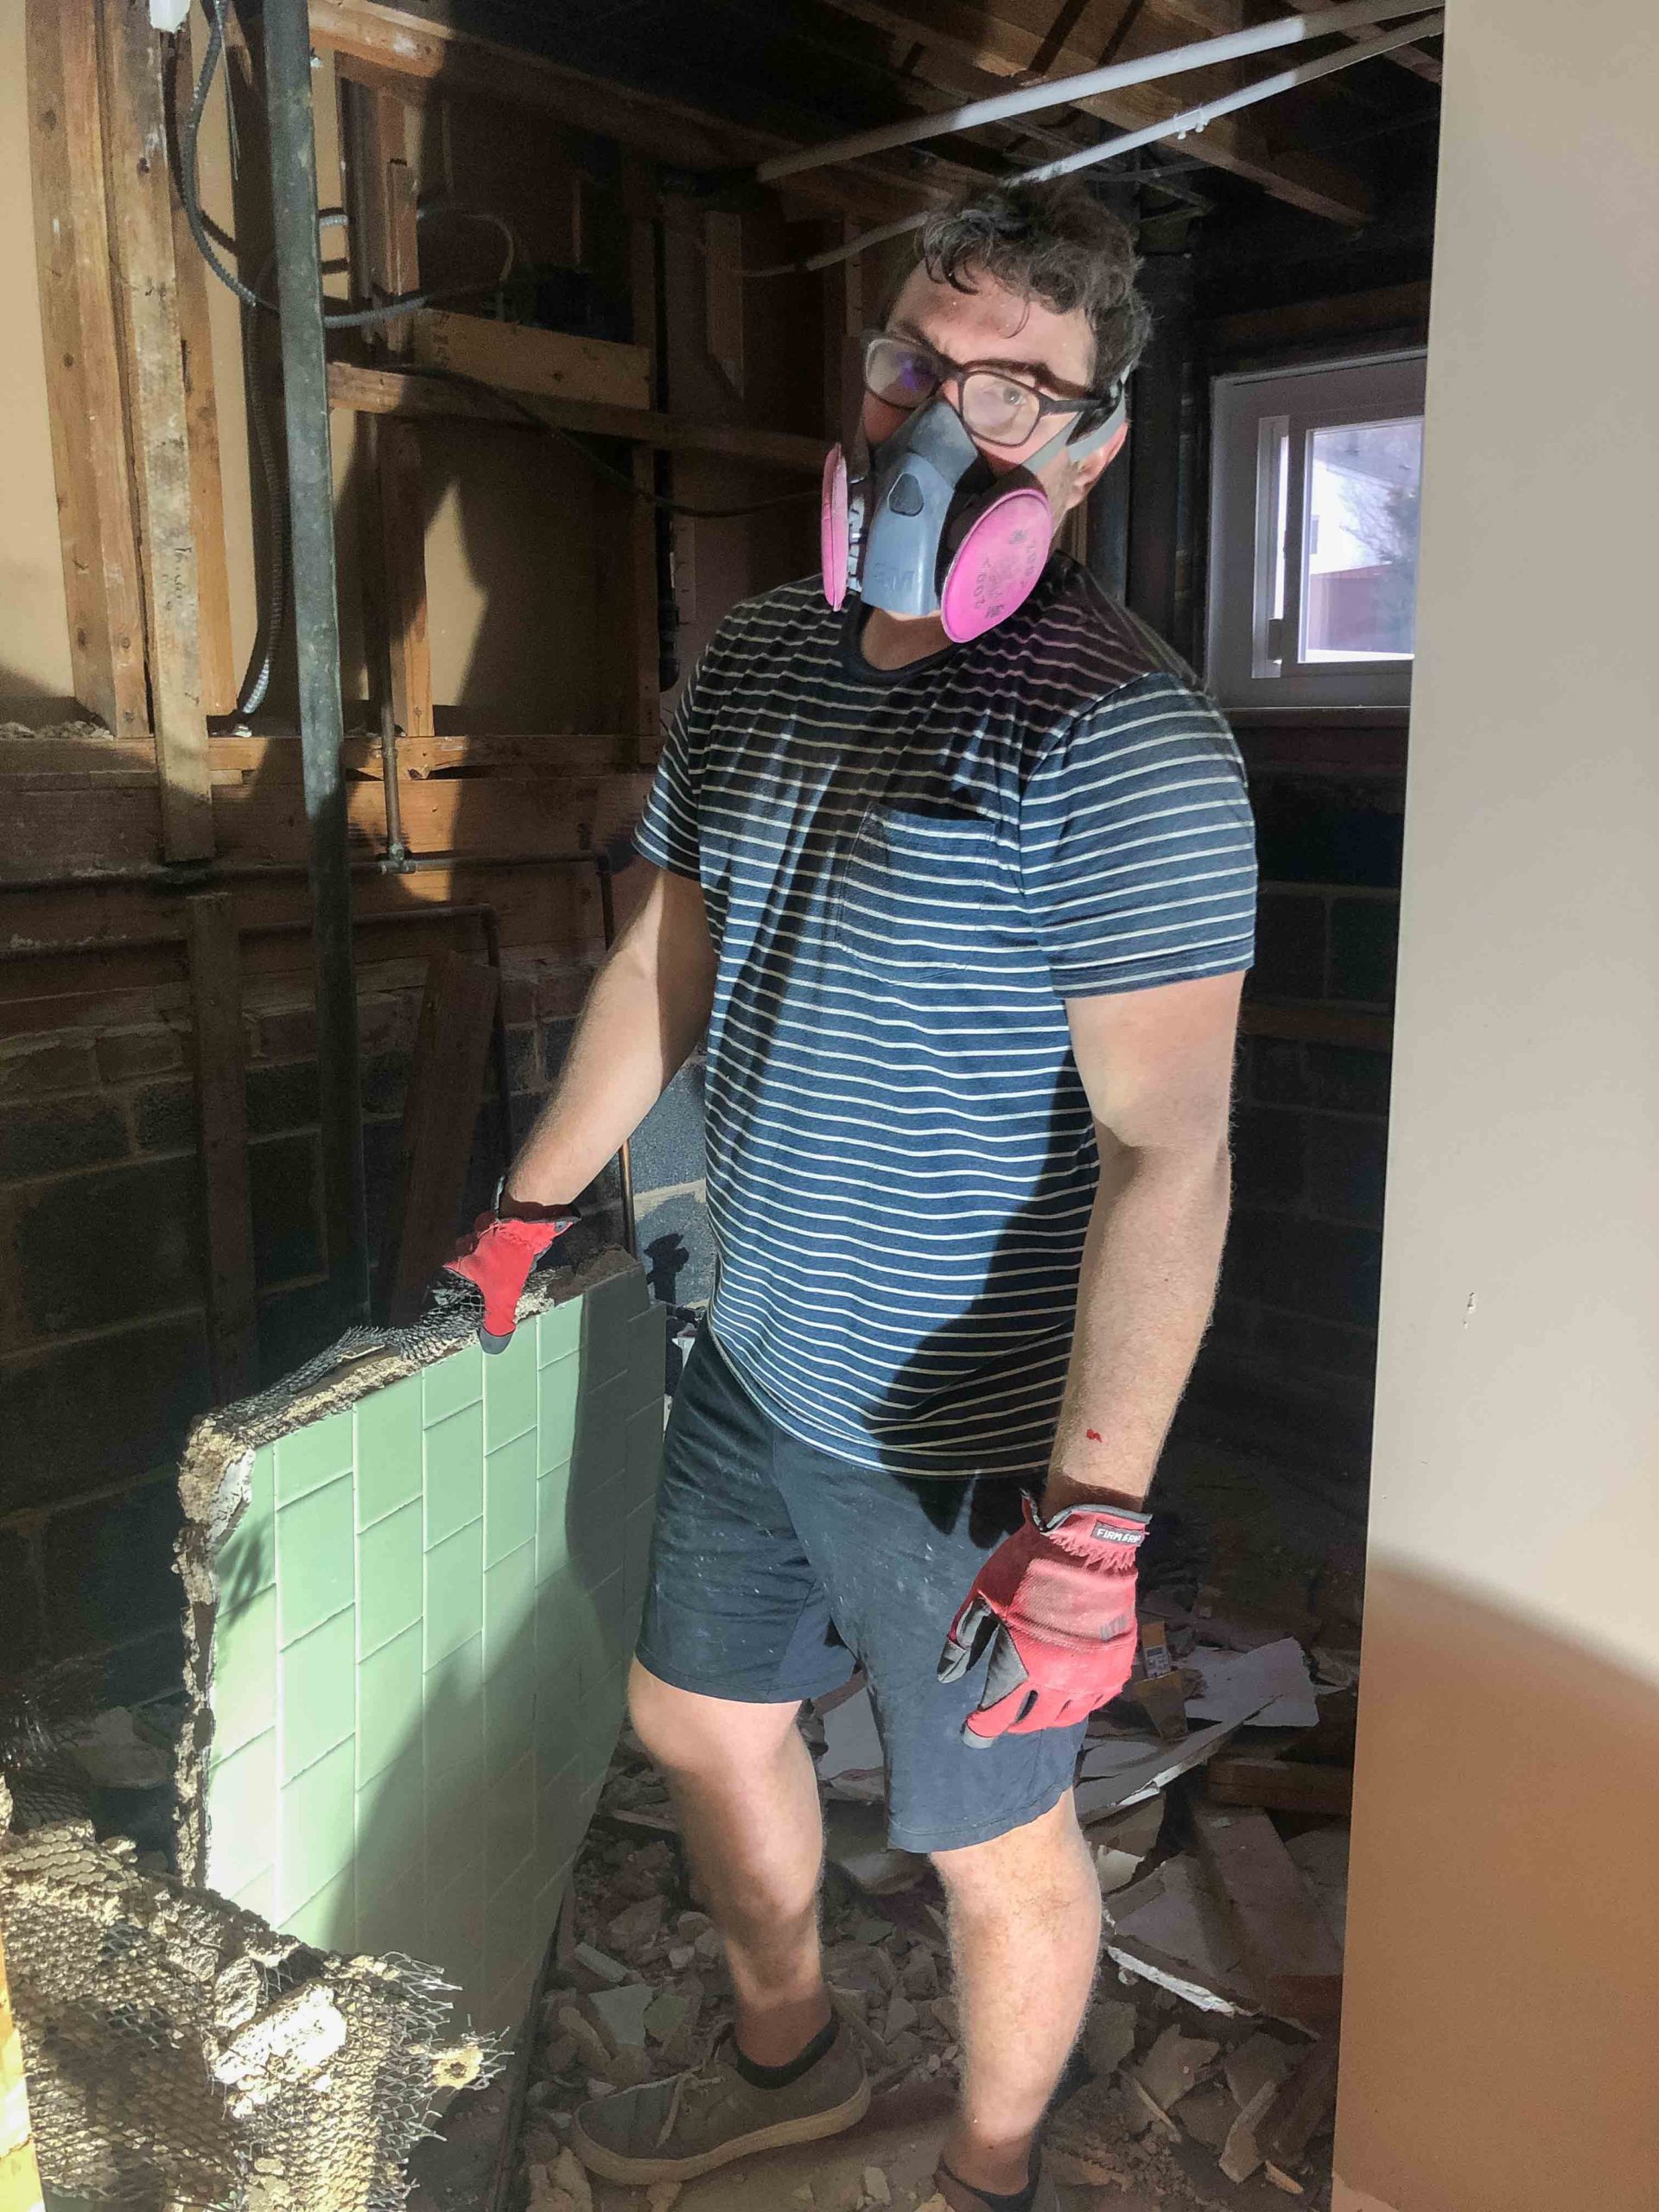
Safety first! PSA: If you ever plan to take on any demo work, be careful! Always make sure you’re wearing closed-toe shoes, preferably pants, goggles, and depending on what you’re demoing, a mask too. (Or, you can do what Nick does and wear shorts, boat shoes, and a popsicle t-shirt…you do you. I won’t tell anyone.)
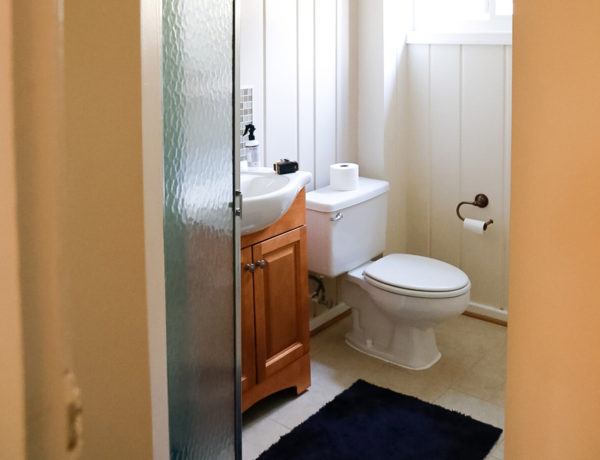
I missed the initial swing of the hammer on this one so, ta-da! Here’s what was behind all that knotty pine, after Nick had safely removed the toilet, vanity, medicine cabinet, and lighting. This part of the demo probably took an hour.
That 1950s tile…
Once the easy part was done, it was time to tackle that green shower. I can barely bear to show you this picture because it triggers my trypophobia BIG TIME. (Google it if you don’t know what it is, and if you have it too, scroll fast past this little pic and I’M SO SORRY.) Helping with this part of demo was so brutal for me!
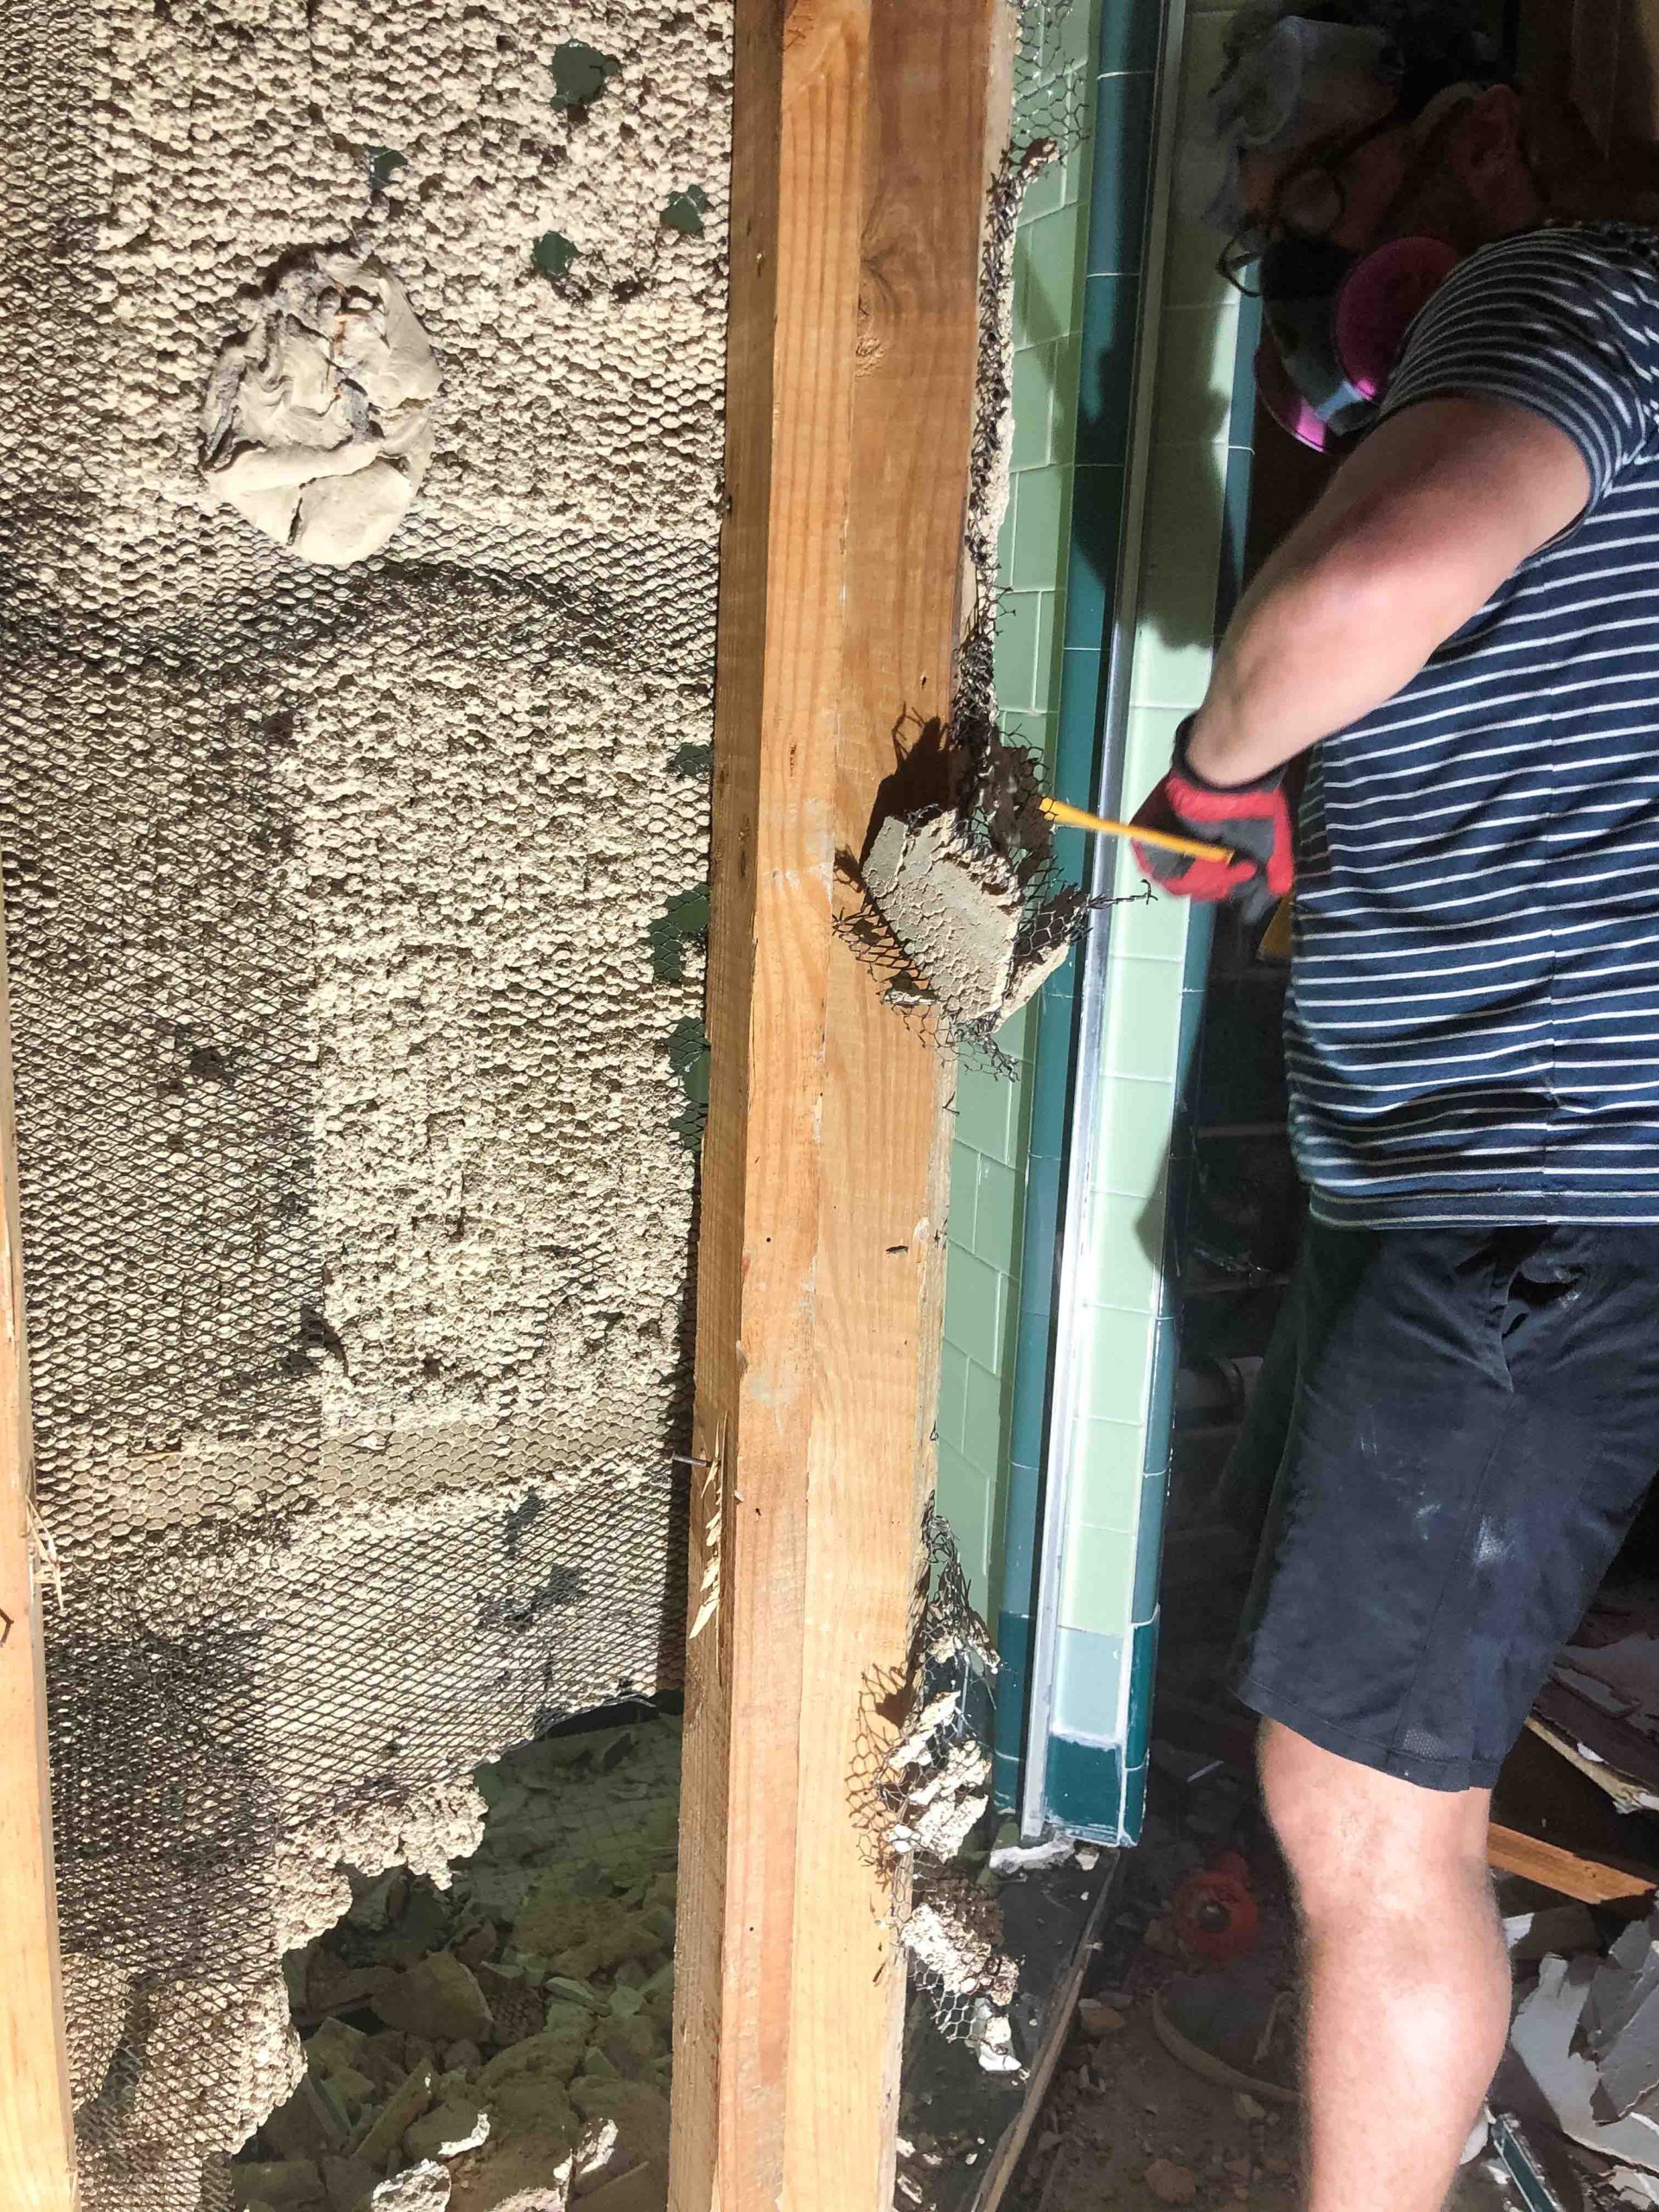
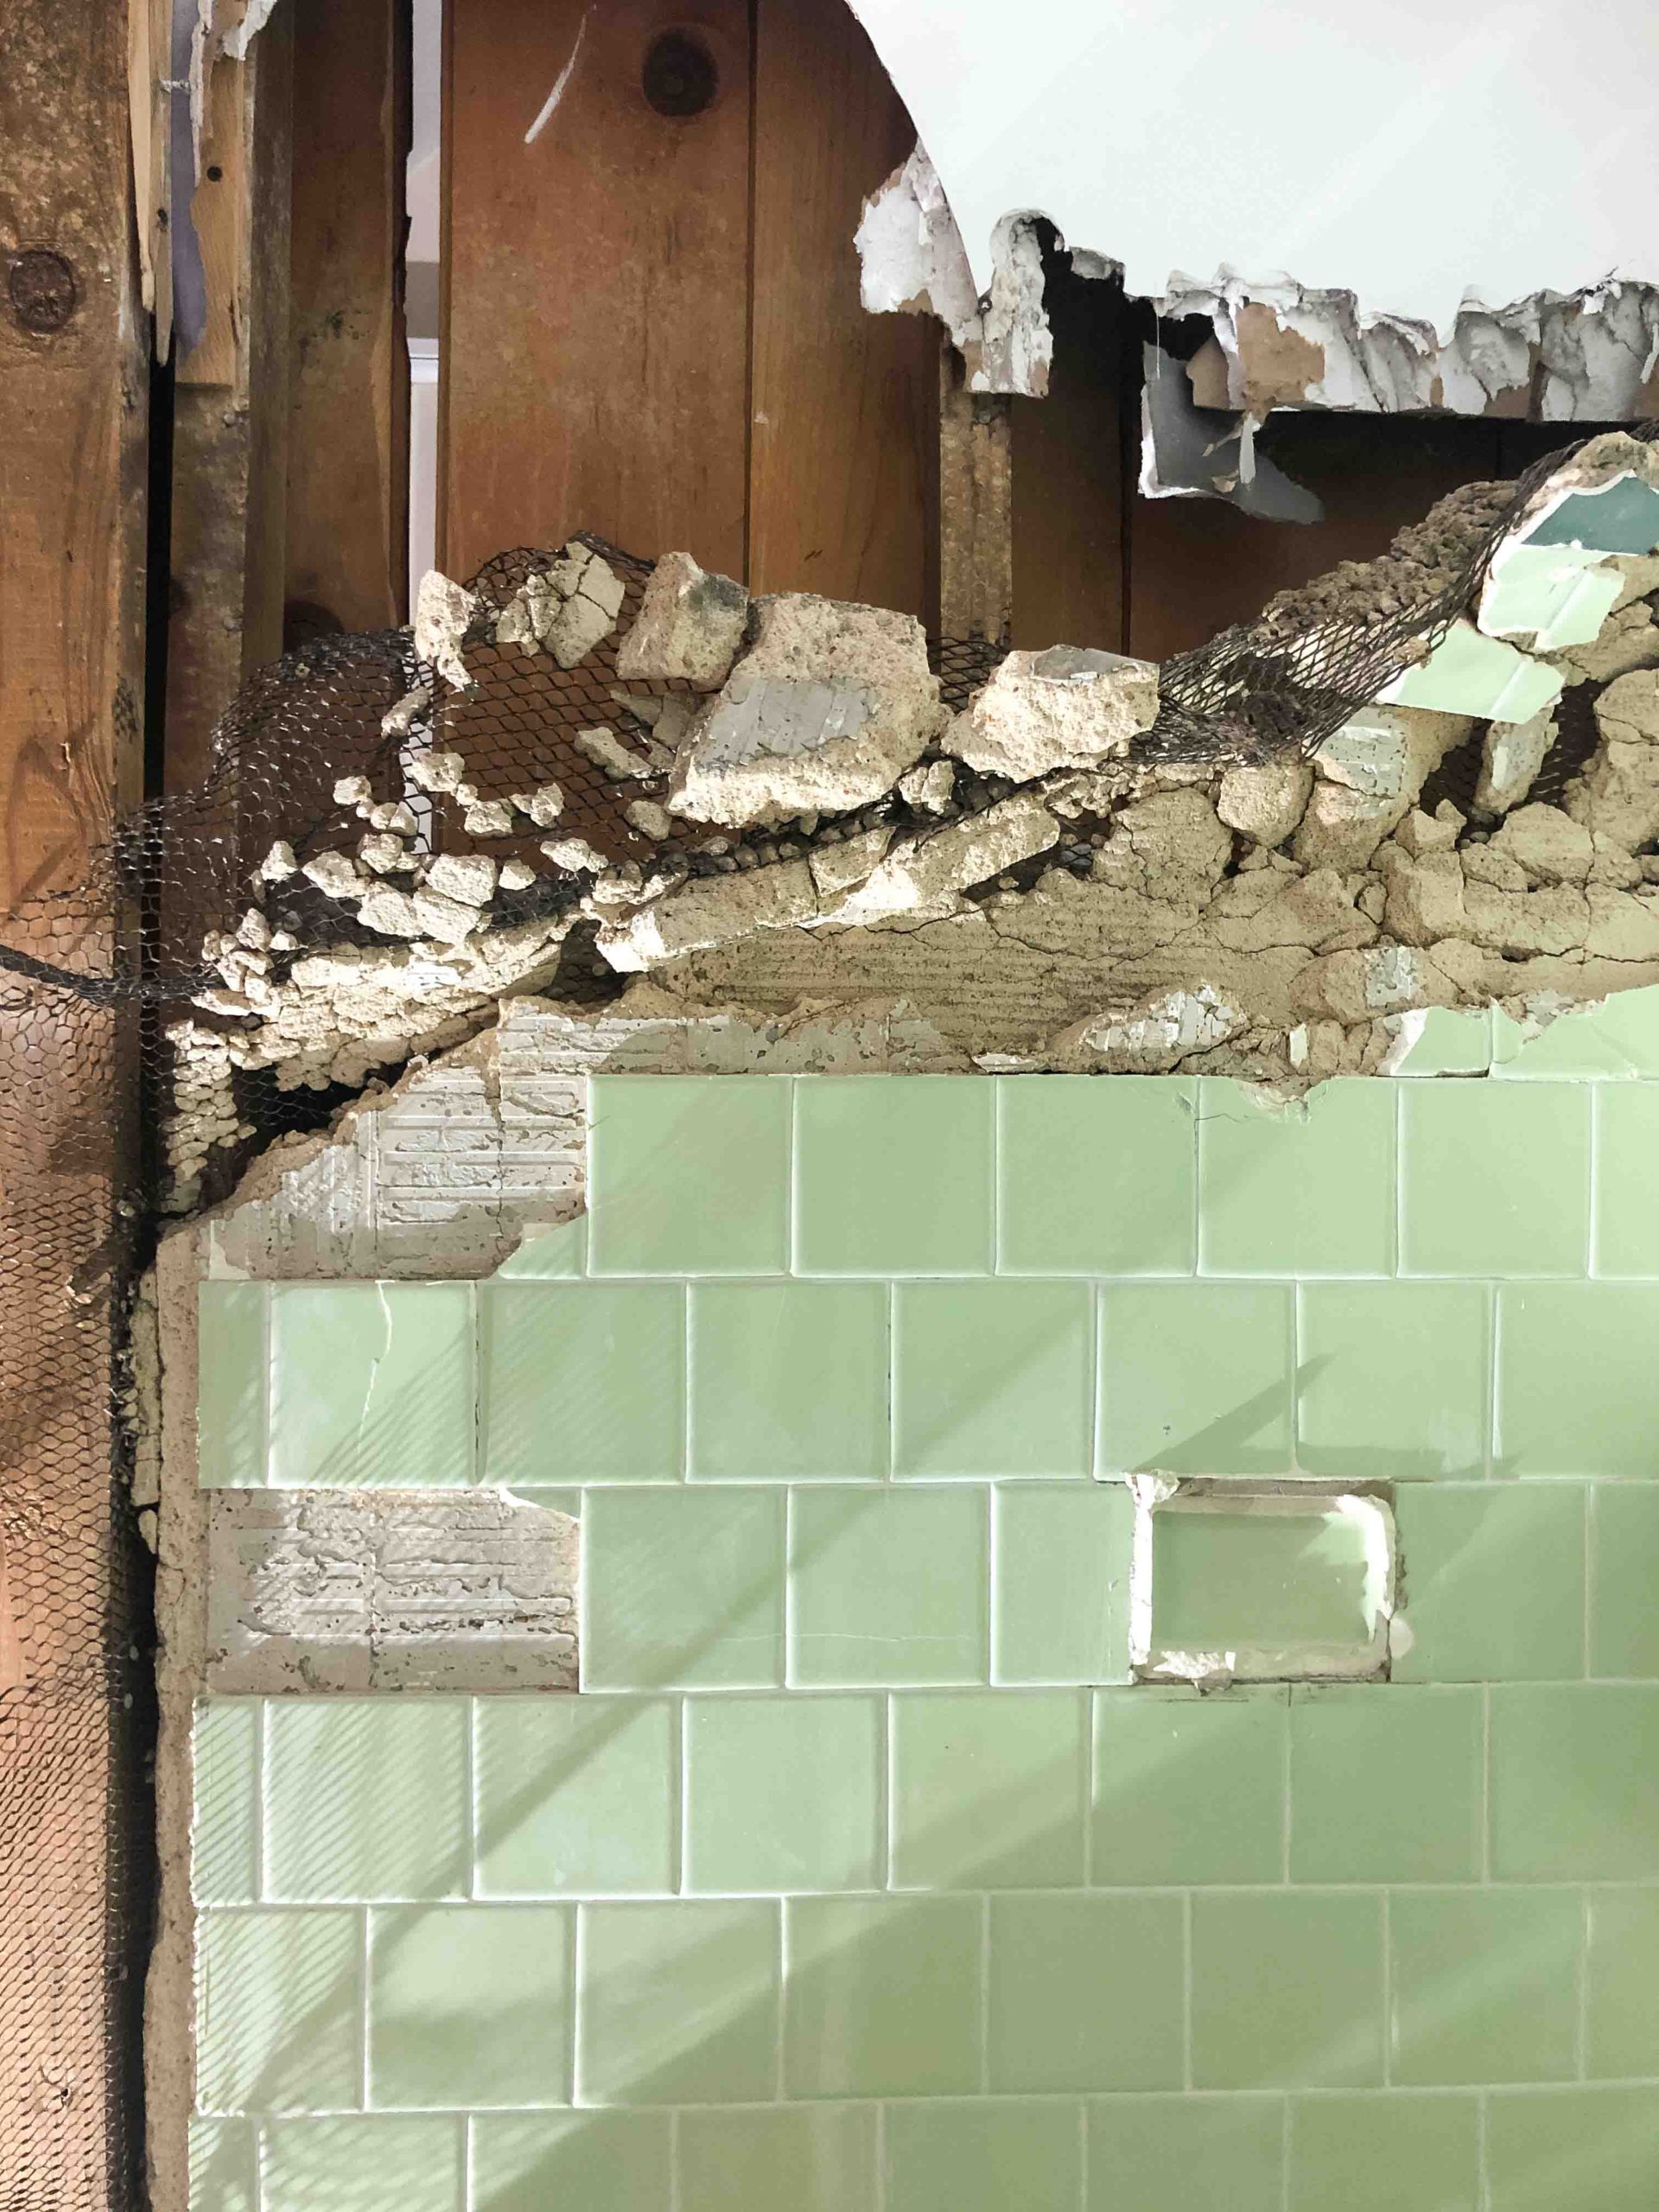
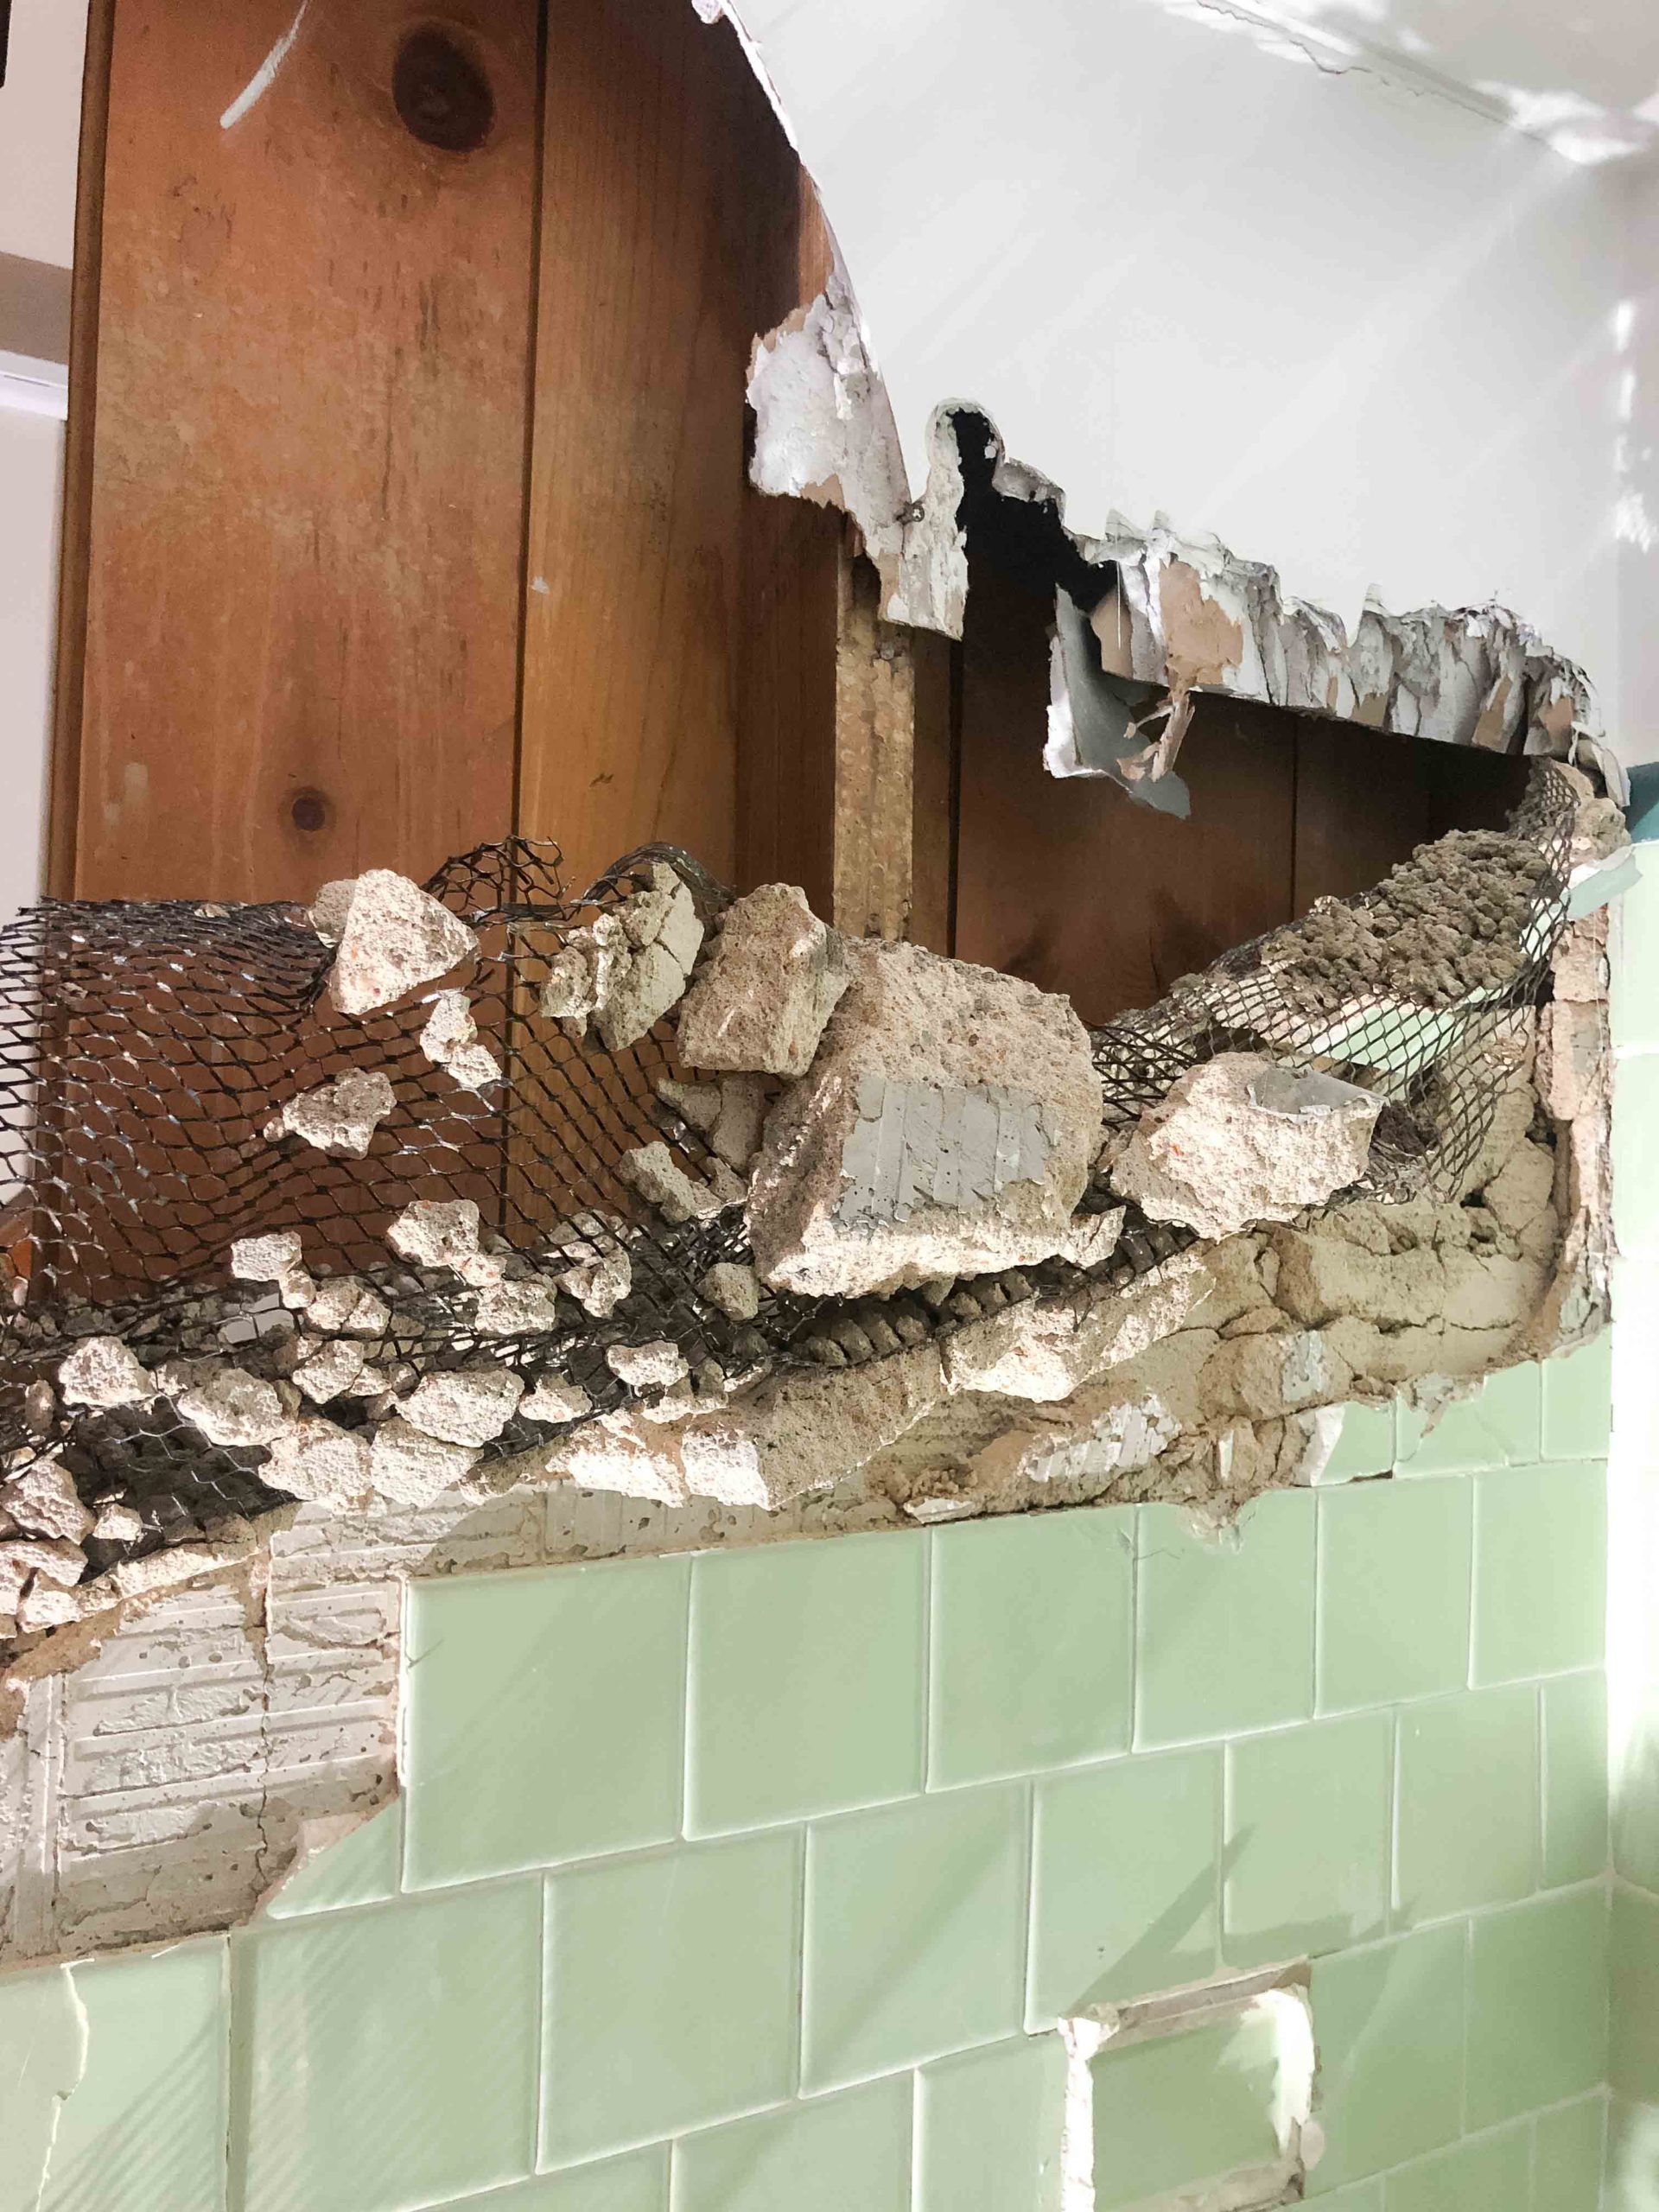
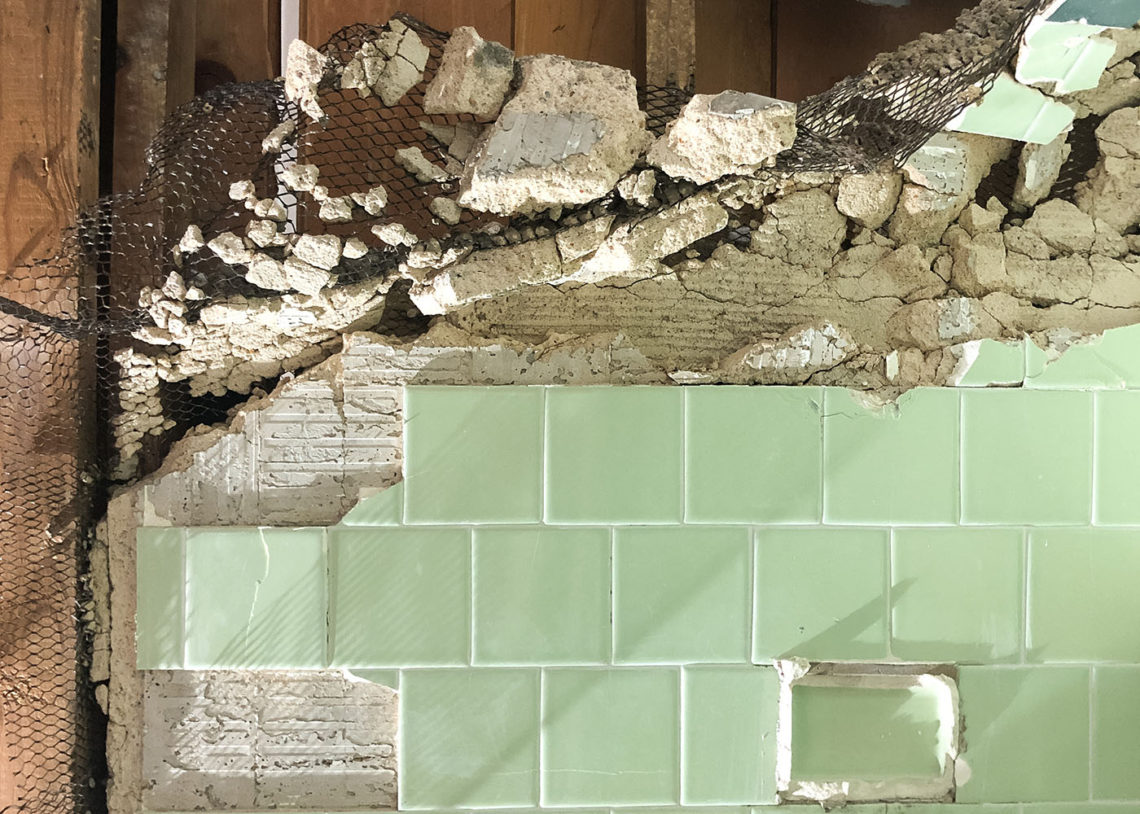
Forget the tile backer you know: in the 1950s, this metal mesh lath was attached straight to the studs, and then they built up about 2″ of concrete before using a mortar to apply the tiles. This demo process was intensive, especially to get it started. Here’s our rubble, and exhibit A for the need for a dumpster.
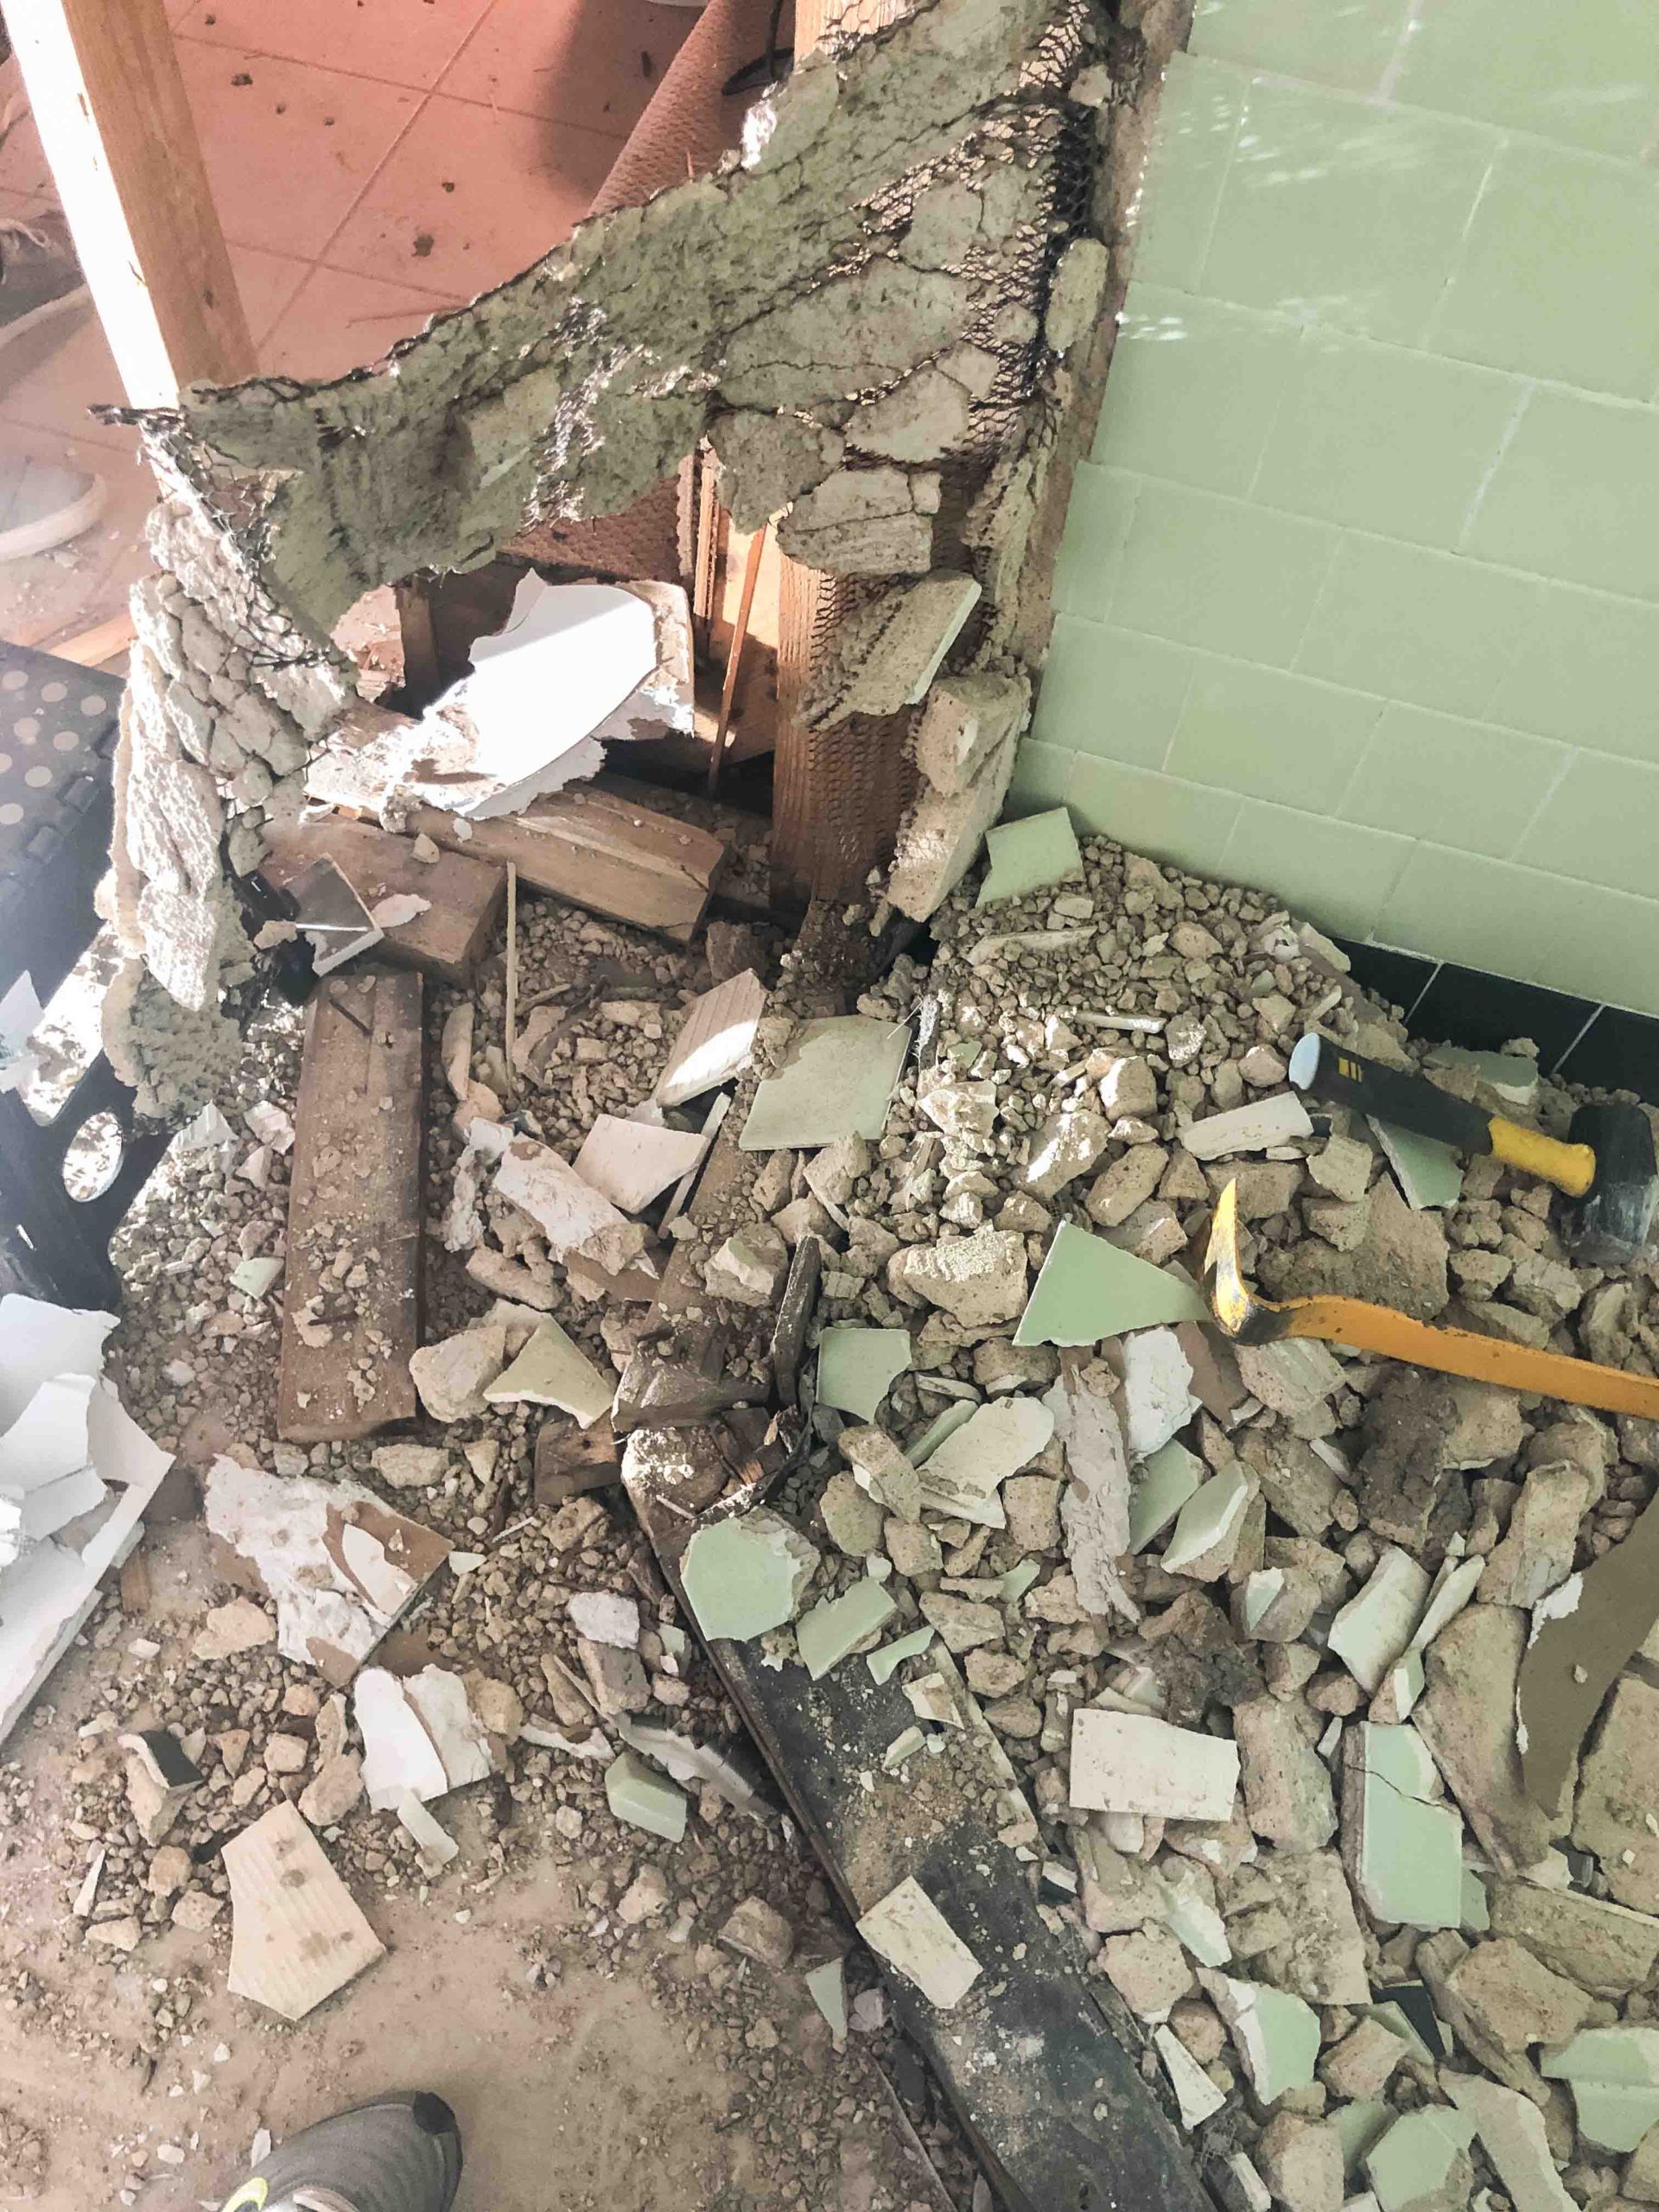
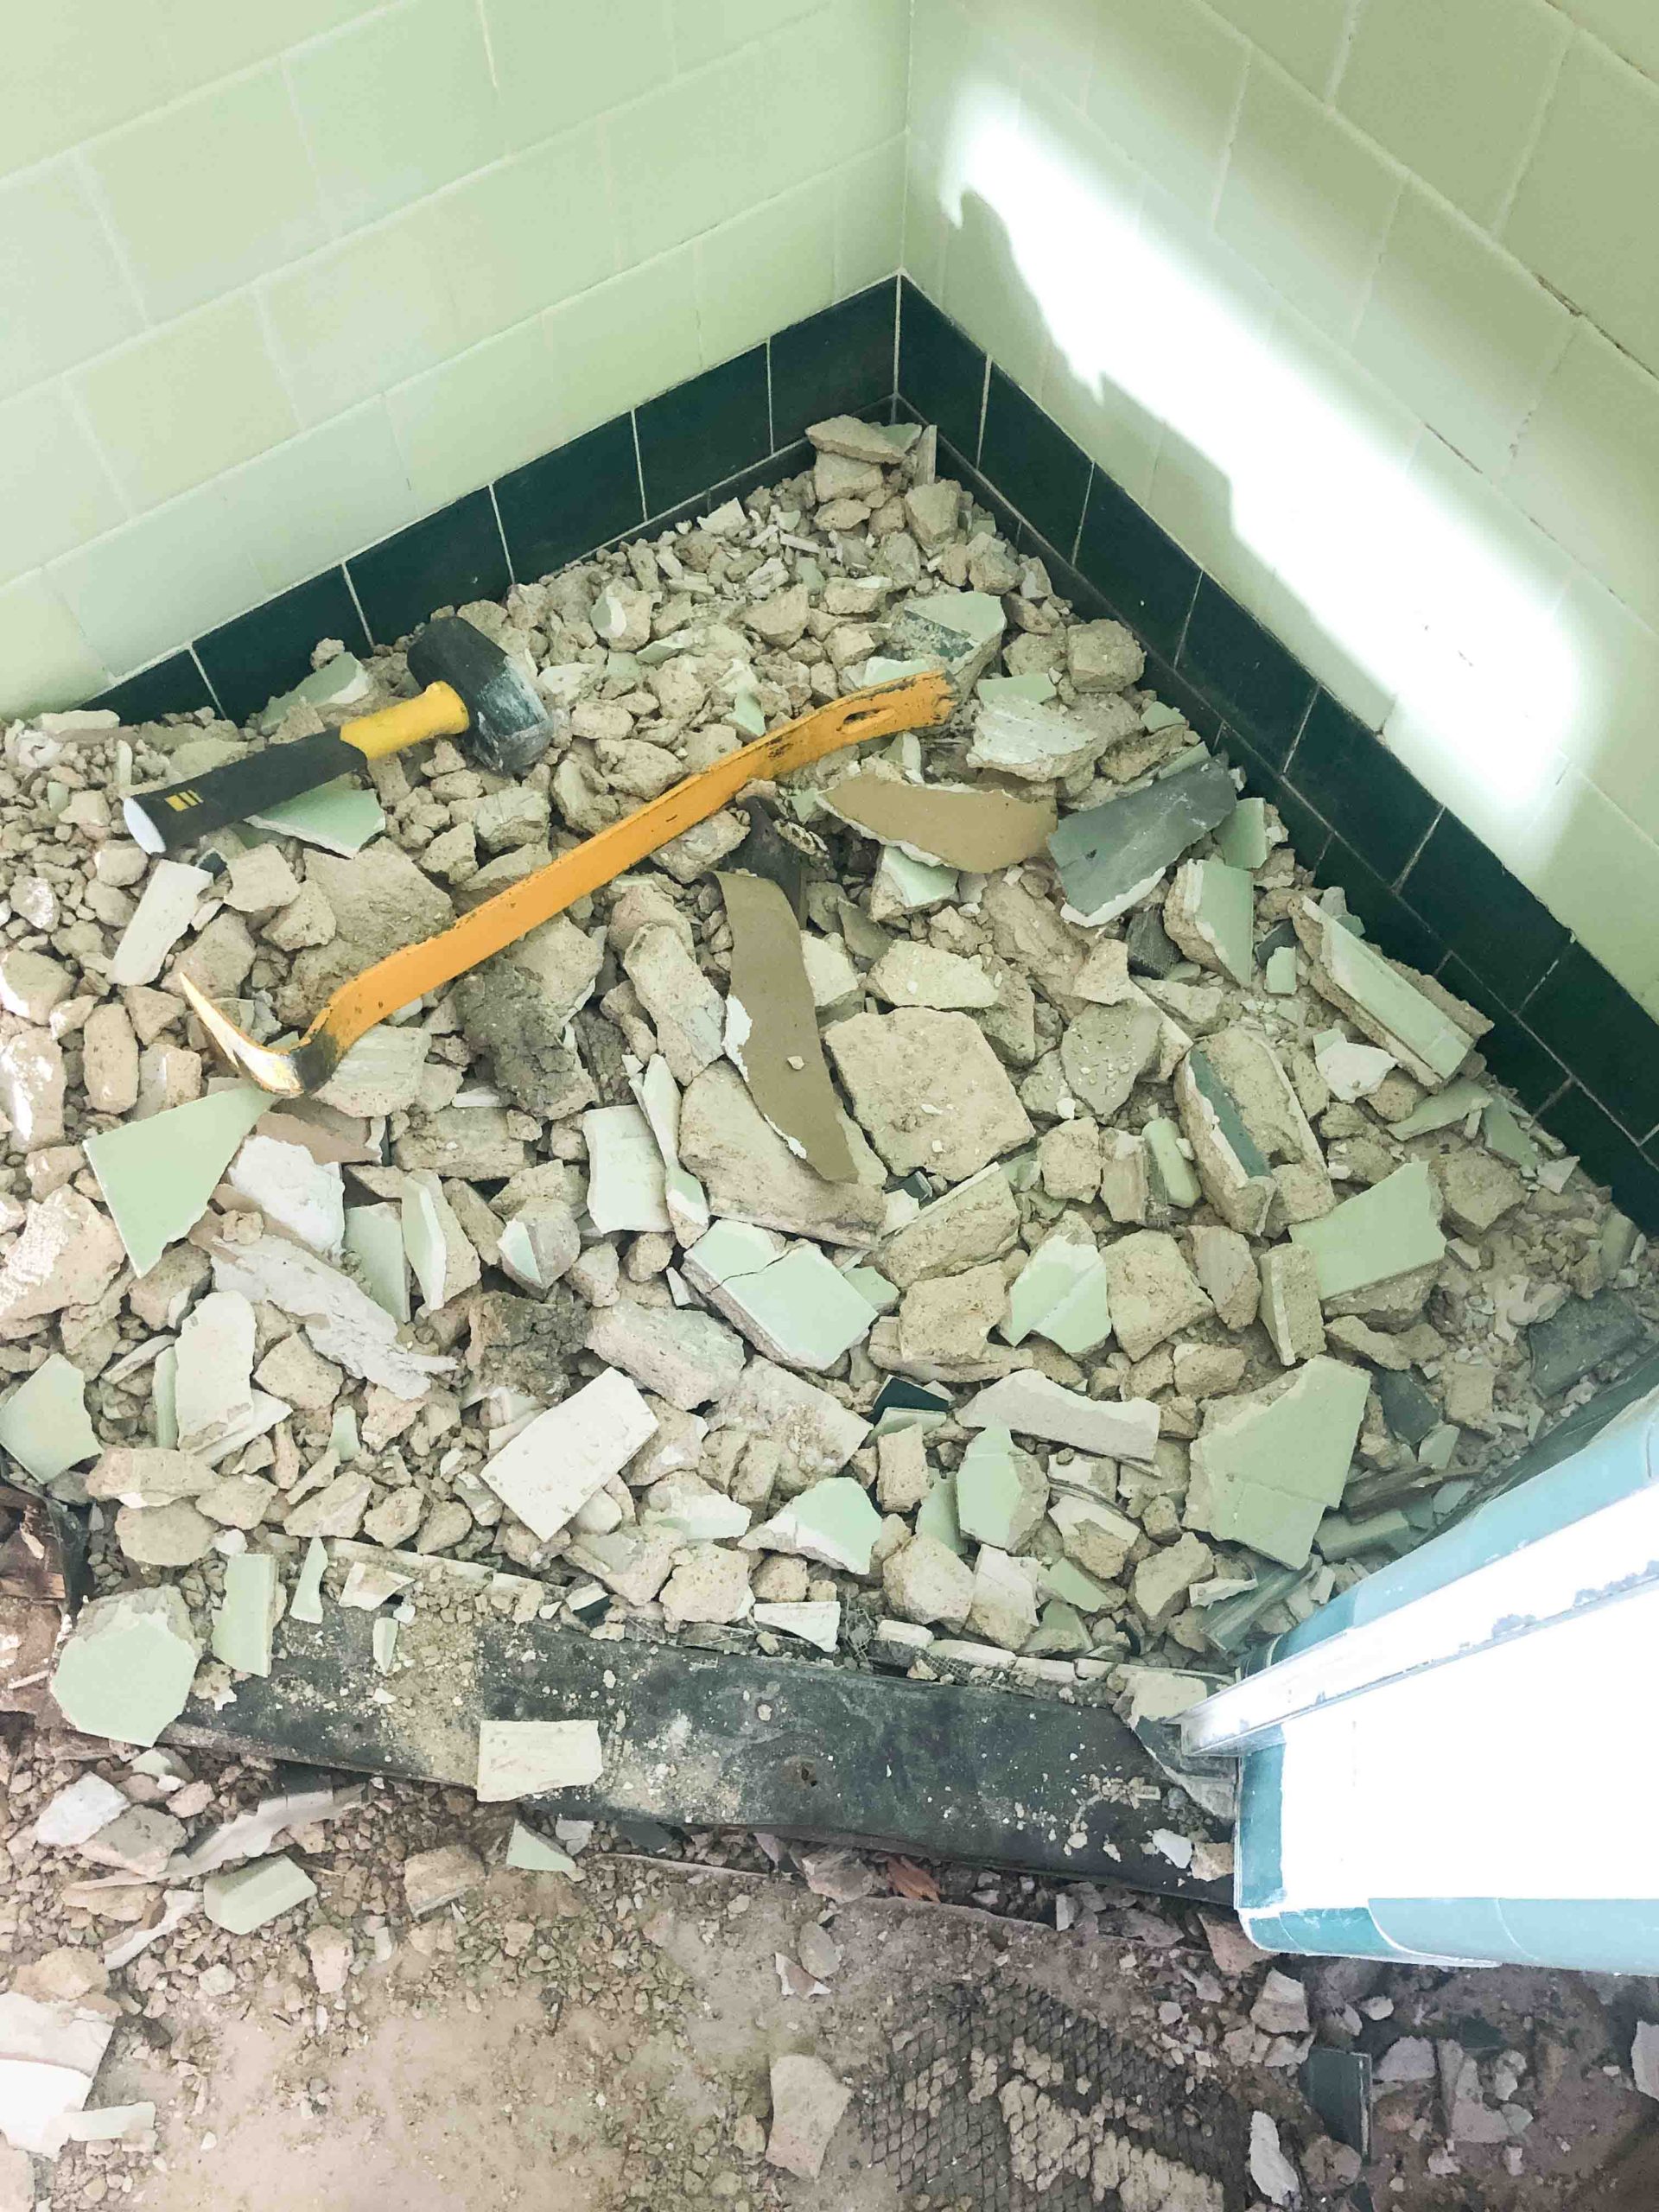
But once you got it going, you could get huge, heavy chunks of tile wall to come down.
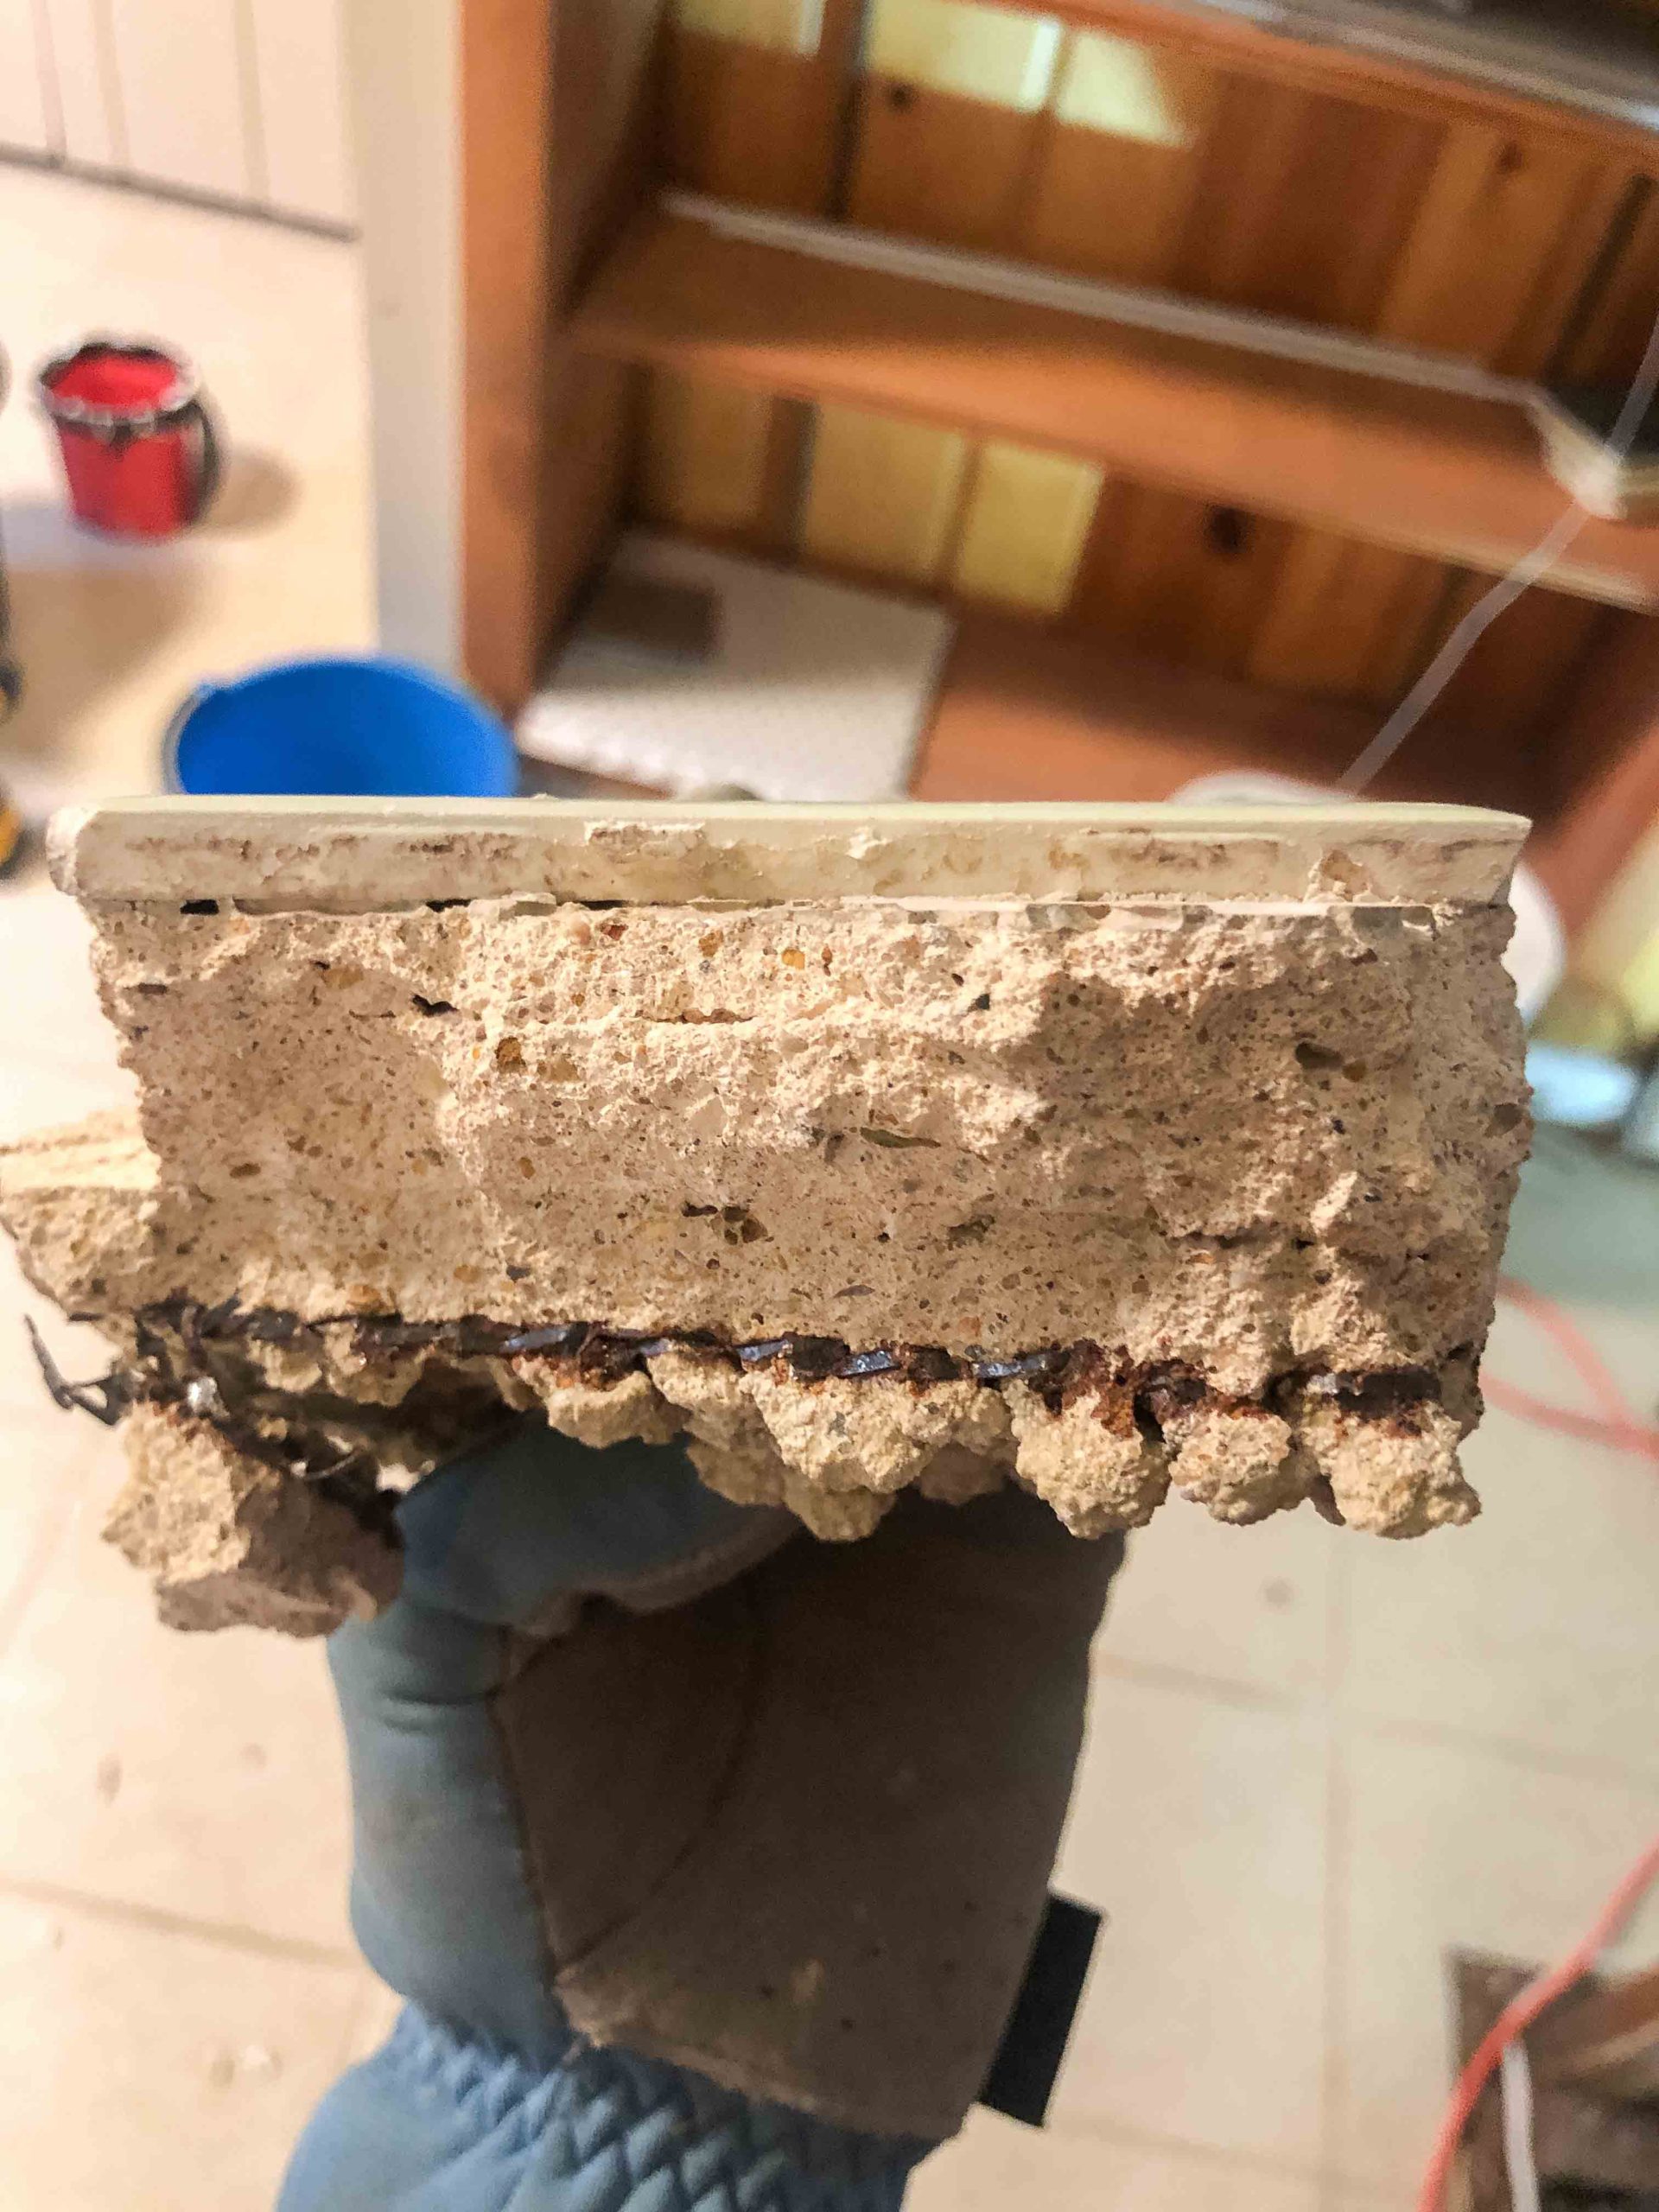
Dir-tay work! But so rewarding. These chunks of wall were crazy heavy but it was so much easier to clean up than all that rubble. Do you love that section cut?! So wild.
Bare bones
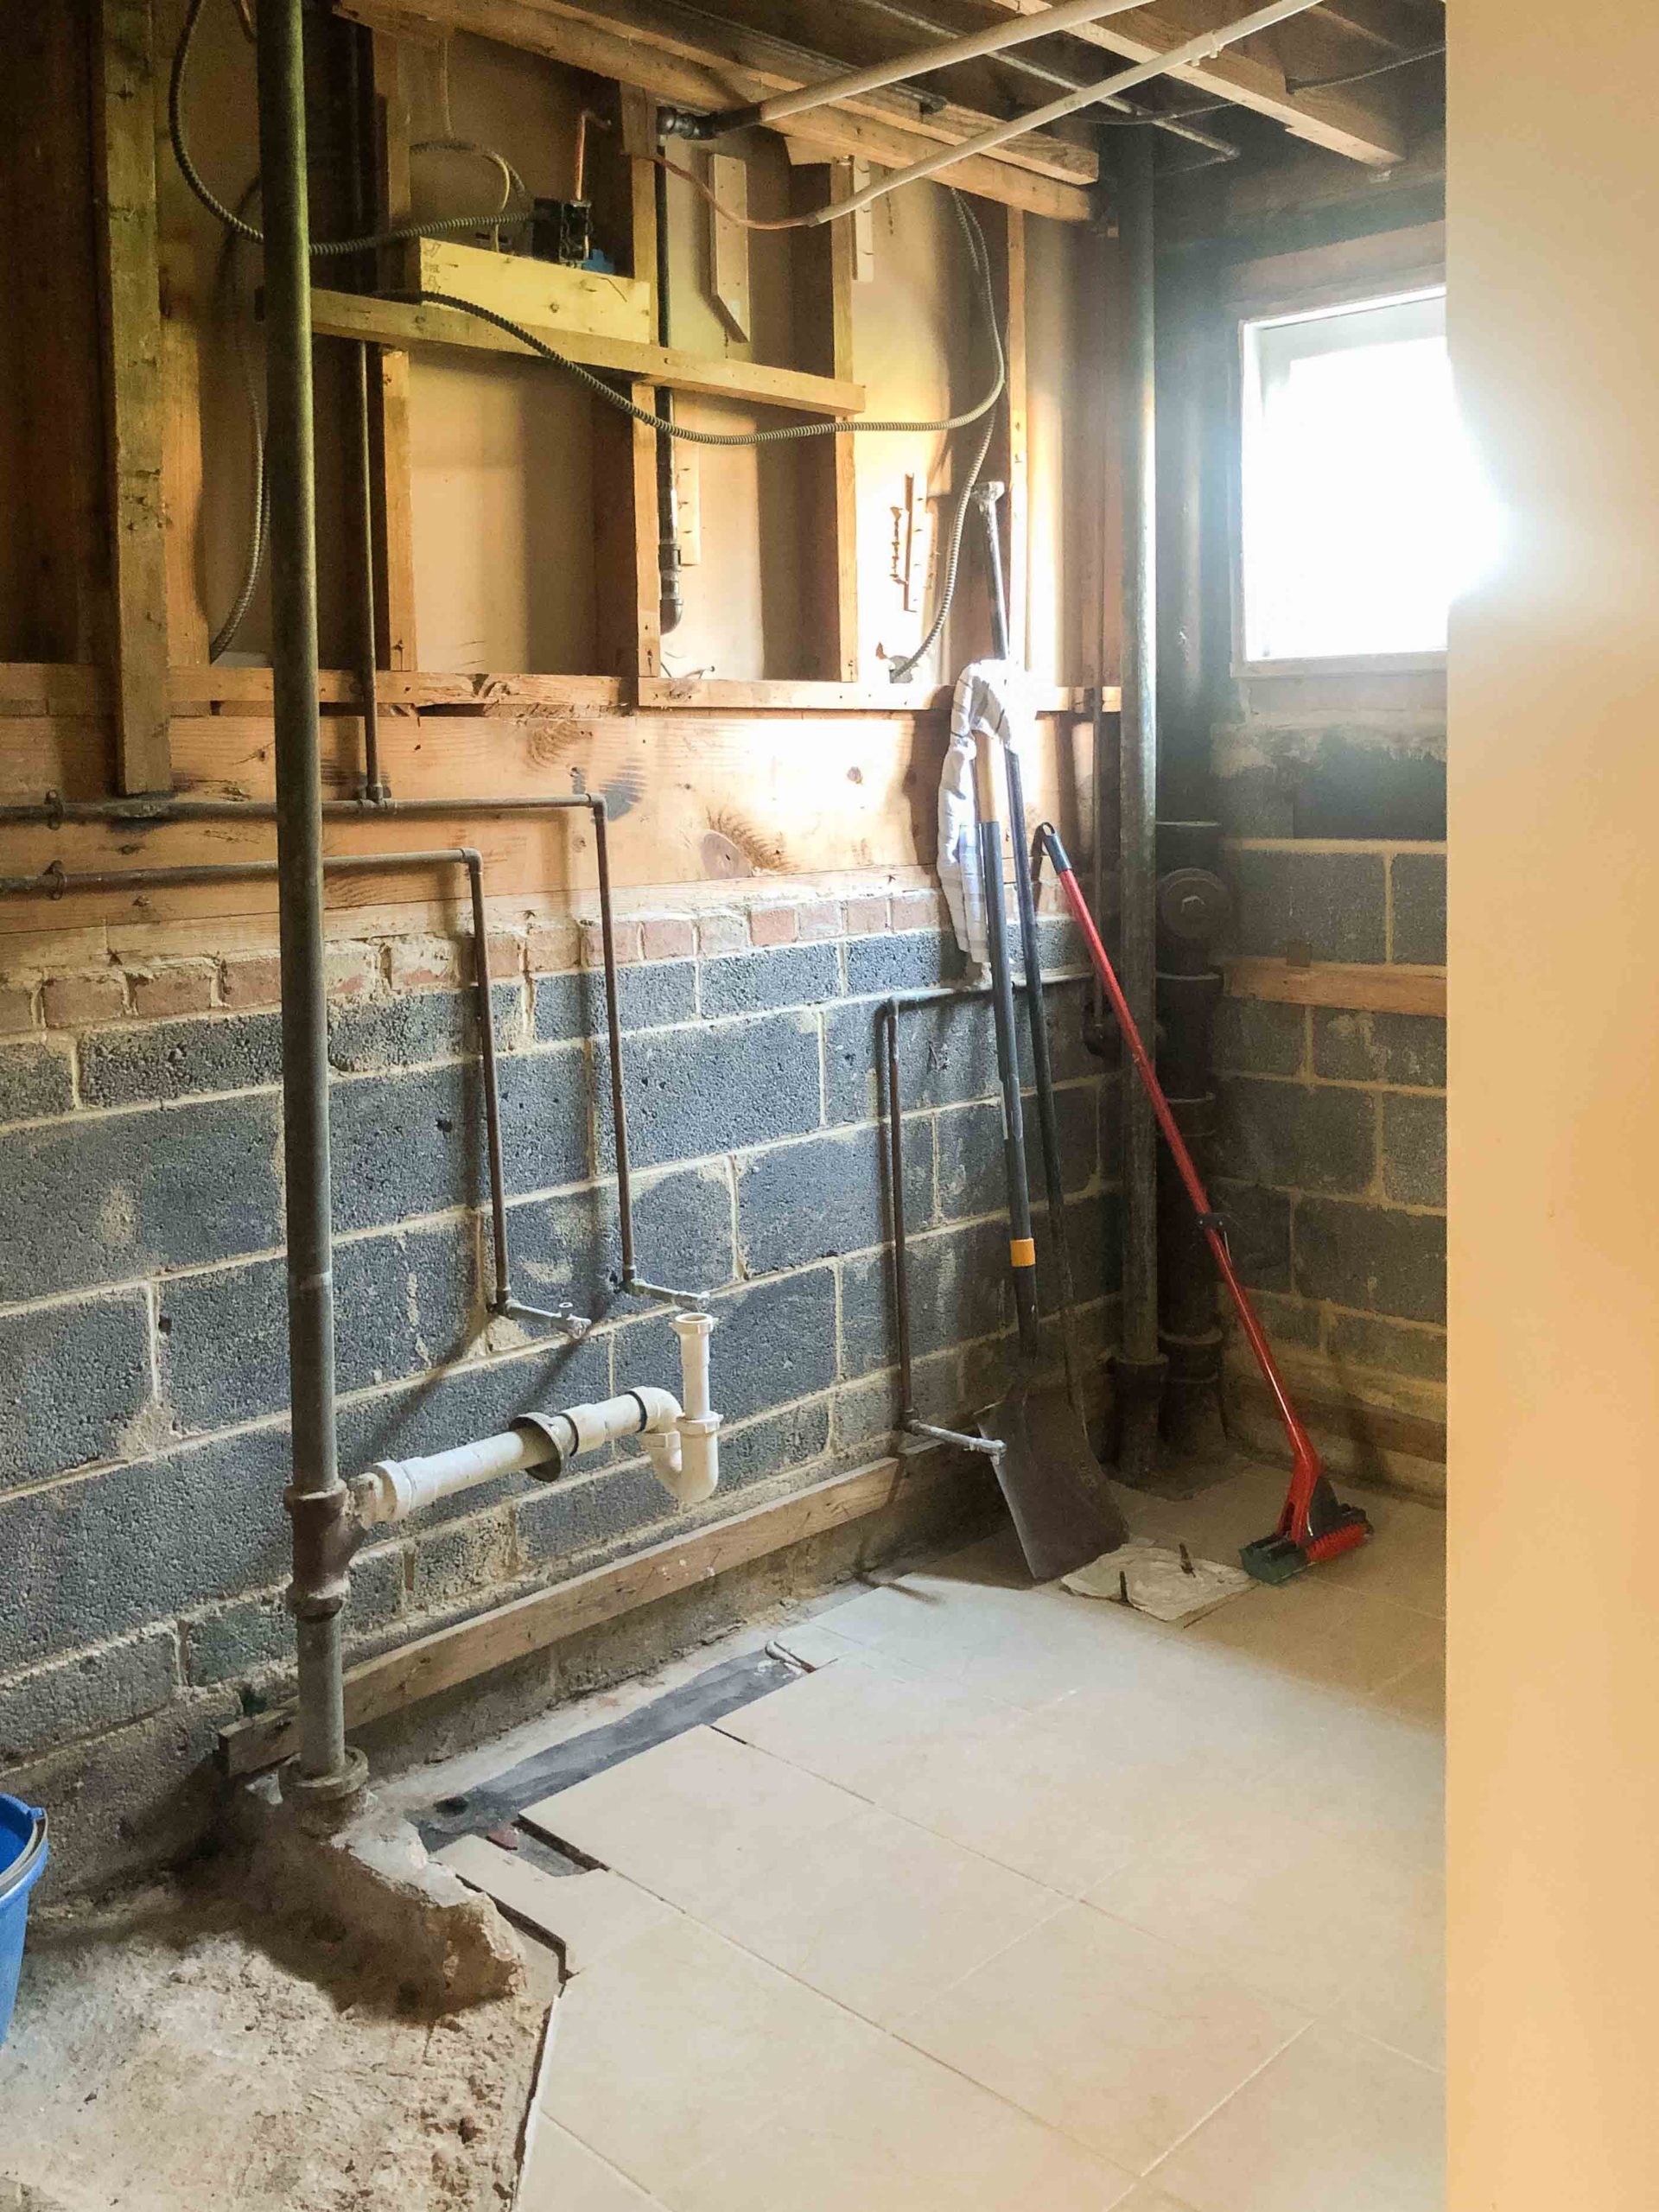
Once we got all the tile out, the rest of the work was purely clean up, evaluation of what electrical and plumbing was living behind those walls, and then—super important—making sure the sewage drains for the toilet and shower are plugged appropriately so sewer gas doesn’t back up in your home! We have a super annoying condition to work with on this project: the vent pipe that was in the prior wall between the shower and vanity can’t budge. We’d be crazy to spend the $$$ and deal with the hassle of moving it! The giant vertical pipe in the images below is what vents the sinks in both the lower level and upstairs bathrooms. Remember, every piece of plumbing that is connected to your sewer has to be vented to the outside of your home. This is where design solutions are put to the test! This will be the reason our renovated shower has a full-height tile wall on one side when we’re done.
Other weird things: can you believe this 1950s bathroom didn’t have a single outlet in it?! Clearly women then weren’t drying and curling their hair. Ha! And our most interesting demo find: a ton of old school straight razors that must have been in the medicine cabinet and had fallen behind the wall.
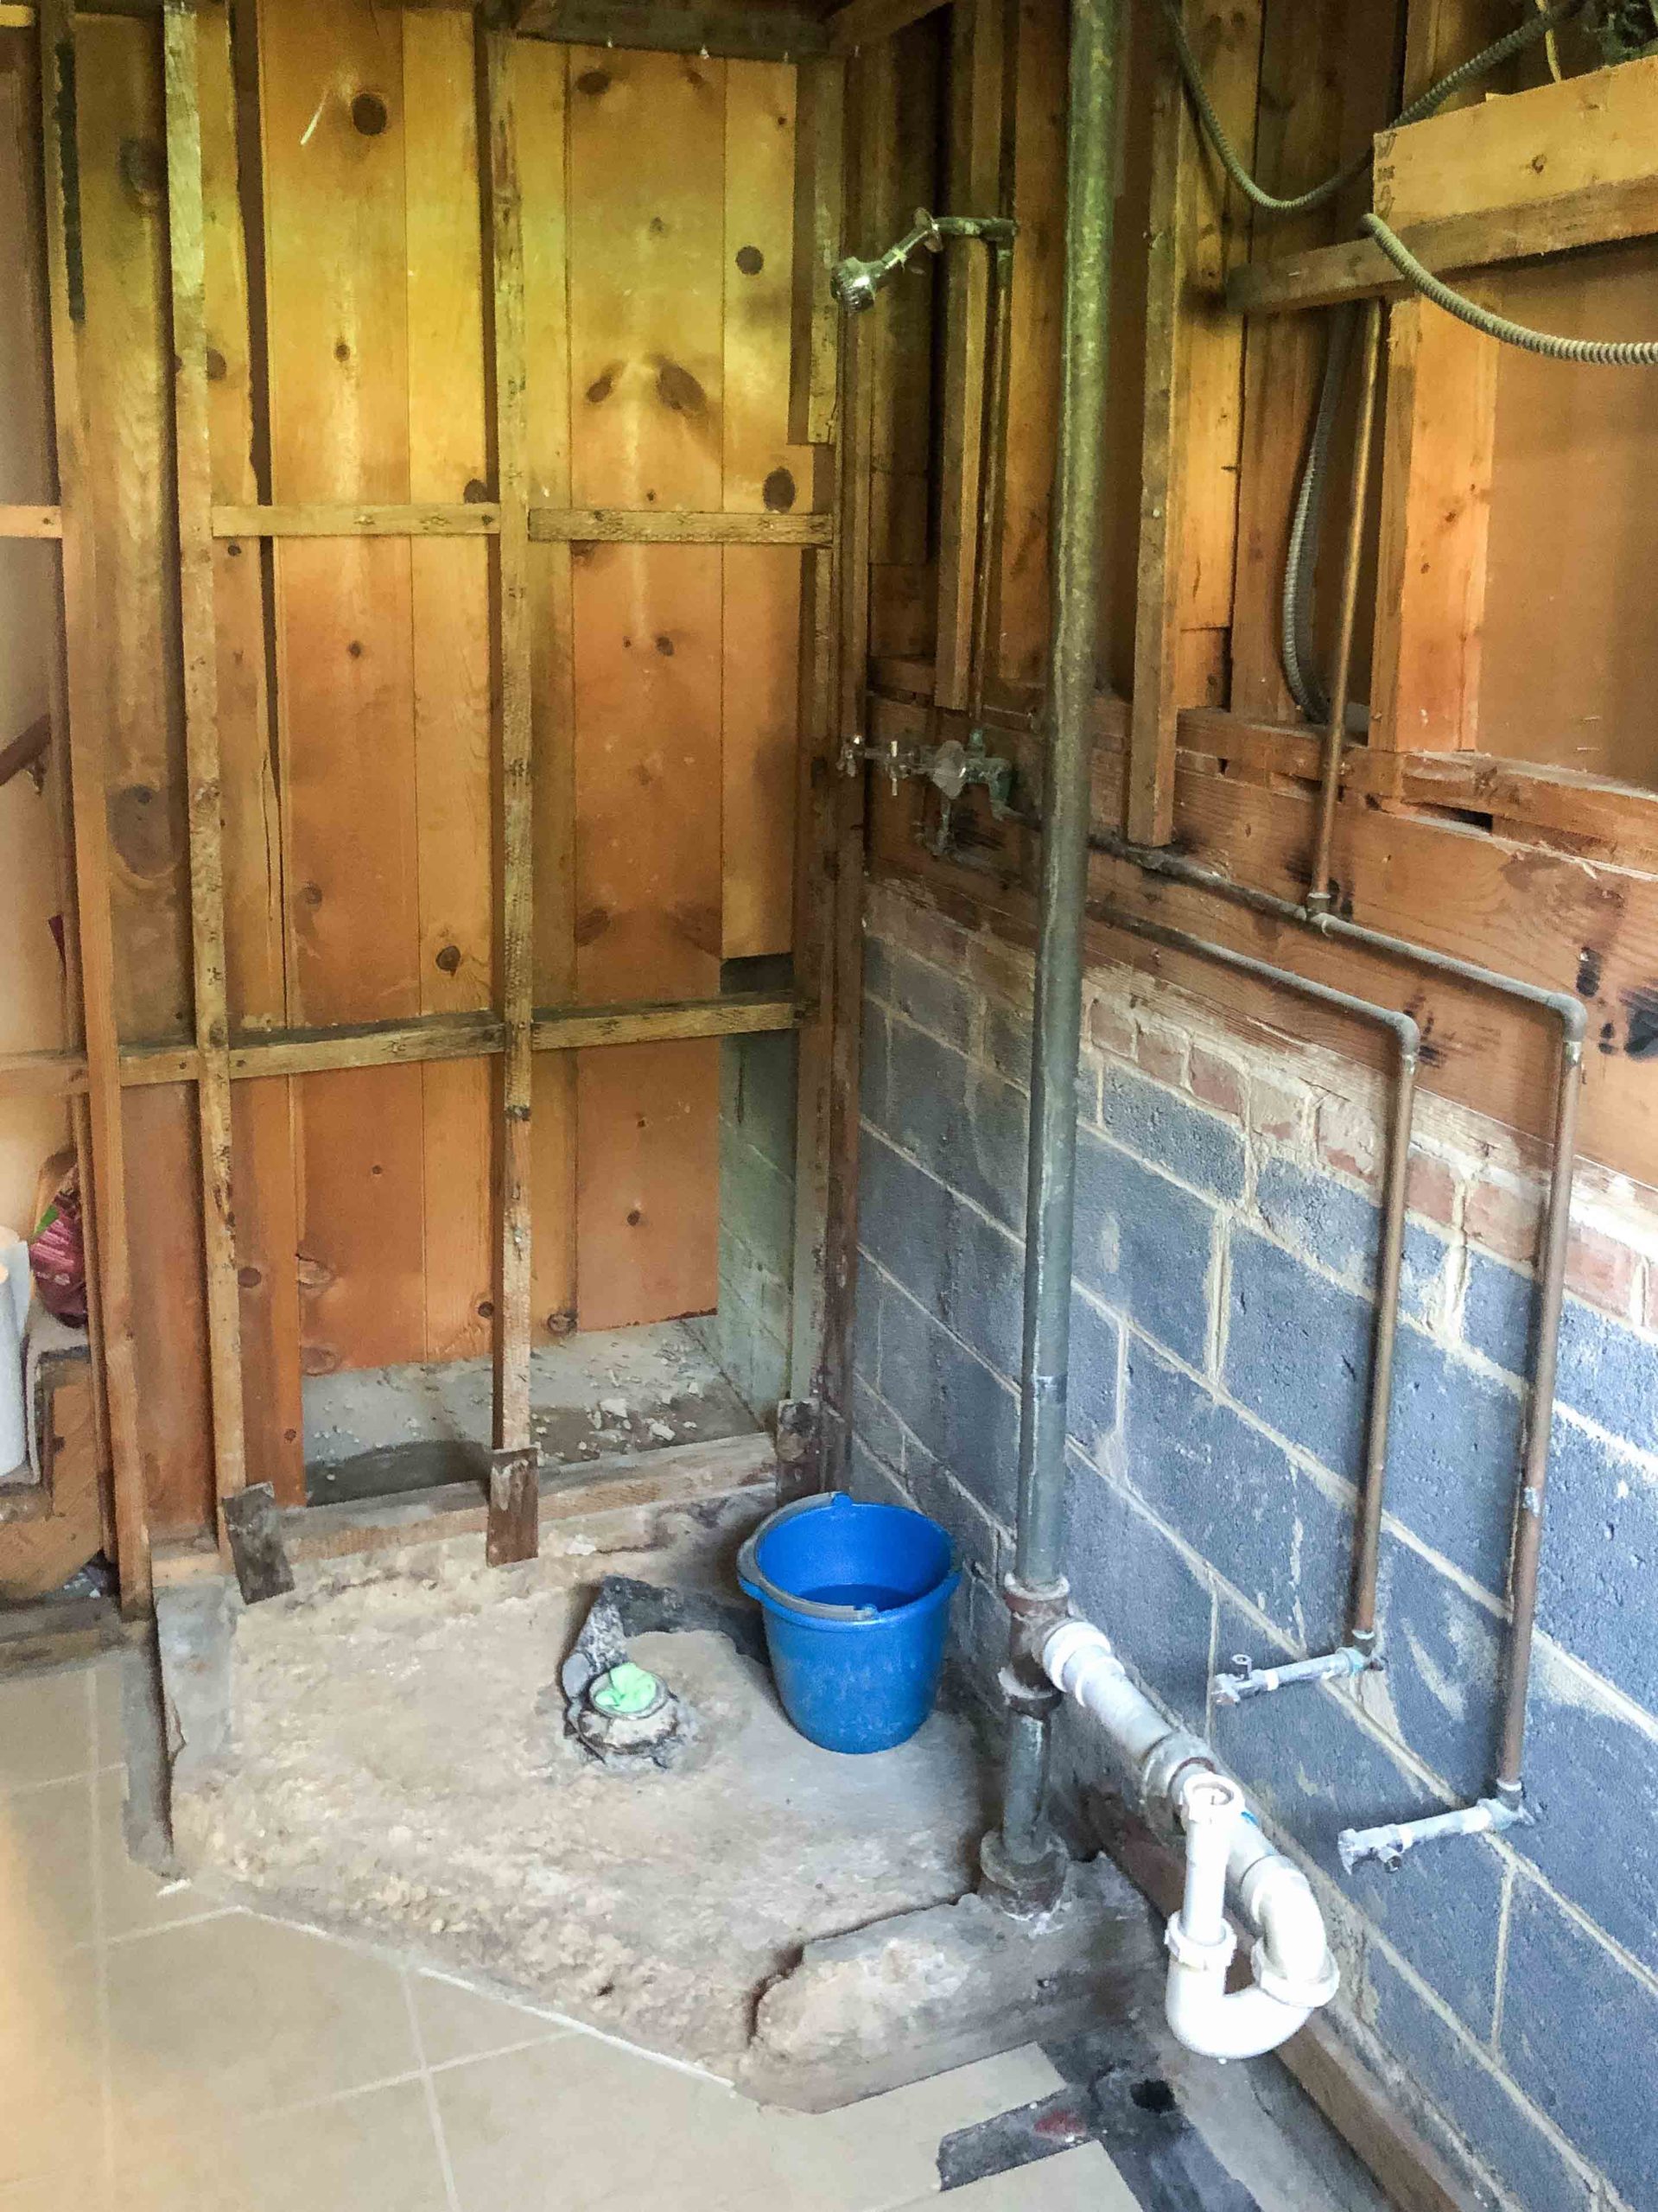
That’s it folks! Here is the blank slate to get started on that new-new. But, I have to warn you: we’re moving slower than expected. The rest of the lower level reno is days from being done, but Nick is also battling a little non-reno injury so we’re moving even slower than planned. But hey, what’s life without a few wrenches here and there?
More about the ORC
- Check out the list of official designer participants
- Explore Week #2 posts from all of the guest participant projects
- Check out the ORC blog for the latest, plus tons of great past projects